Two Dot Awesome
Rancher 2.0 is coming, and it’s amazing.
In the Beginning…
When Rancher released 1.0 in early 2016, the container landscape looked
completely different. Kubernetes wasn’t the powerhouse that it is today.
Swarm and Mesos satisfied specific use cases, and the bulk of the
community still used Docker and Docker Compose with tools like Ansible,
Puppet, or Chef. It was still BYOLB (bring your own load balancer), and
volume management was another manual nightmare. Rancher stepped in with
Cattle, and with it we augmented Docker with overlay networking,
multi-cloud environments, health checking, load balancing, storage
volume drivers, scheduling, and other features, while keeping the format
of Docker Compose for configuration. We delivered an API, command-line
tools, and a user interface that made launching services simple and
intuitive. That’s key: simple and intuitive. With these two things, we
abstracted the complexities of disparate systems and offered a way for
businesses to run container workloads without having to manage the
technology required to do so. We also gave the community the ability to
run Swarm, Kubernetes, or Mesos, but we drew the line at managing the
infrastructure components and stepped back, giving operators the ability
to do whatever they wanted within each of those systems. “Here’s
Kubernetes,” we said. “We’ll keep the lights on but, beyond that, using
Kubernetes is up to you. Have fun!” If you compress the next 16 months
into a few thoughts, looking only at our user base, we can say that
Kubernetes adoption has grown dramatically, while Mesos and Swarm
adoption has fallen. The functionality of Kubernetes has caught up with
the functionality of Cattle and, in some areas, has surpassed it as
vendors develop Kubernetes integrations that they aren’t developing
directly for Docker. Many of the features in Cattle have analogs in
Kubernetes, such as label-based selection for scheduling and load
balancing, resource limits for services, collecting containers into
groups that share the same network space, and more. If we take a few
steps back and look at it objectively, one might say that by developing
Cattle-specific services, we’re essentially developing a clone of
Kubernetes at a slower pace than Kubernetes themselves. Rancher
2.0 changes that.
The Engine Does Not Matter
First, let me be totally clear: our beloved Cattle is not going
anywhere, nor is RancherOS or Longhorn. If you get into your car and
drive somewhere, what matters is that you get there. Some of you might
care about the model of your car or its top speed, but most people just
care about getting to the destination. Few people care about the engine
or its specifics. We only look under the hood when something is going
wrong. The engine for Cattle in Rancher 1.x was Docker and Docker
Compose. In Rancher 2.x, the engine is Kubernetes, but it doesn’t
matter. In Rancher 1.x, you can go to the UI or the API and deploy
environments with an overlay network, bring up stacks and services,
import docker-compose.yml files, add load balancers, deploy items from
the Catalog, and more. In Rancher 2.x, guess what you can do? You can do
the exact same things, in the exact same way. Sure, we’ve improved the
UI and changed the names of some items, but the core functionality is
the same. We’re moving away from using the term Cattle, because now
Cattle is no different from Kubernetes in practice. It might be
confusing at first, but I assure you that a rose by any other name still
smells as sweet. If you’re someone who doesn’t care about Kubernetes,
then you can continue not caring about it. In Rancher 1.x, we deployed
Kubernetes into an environment as an add-on to Rancher. In 2.x, we
integrated Kubernetes with the Rancher server. It’s transparent, and
unless you go looking for it, you’ll never see it. What you will see
are features that didn’t exist in 1.x and that, frankly, we couldn’t
easily build on top of Docker because it doesn’t support them. Let’s
talk about those things, so you can be excited about what’s coming.
The Goodies
Here is a small list of the things that you can do with Rancher 2.x
without even knowing that Kubernetes exists.
Storage Volume Drivers
In Rancher 1.x, you were limited to named and anonymous Docker volumes,
bind-mounted volumes, EBS, NFS, and some vendor-specific storage
solutions (EMC, NetApp, etc.). In Rancher 2.x, you can leverage any
storage volume driver supported by Kubernetes. Out of the box, this
brings NFS, EBS, GCE, Glusterfs, vSphere, Cinder, Ceph, Azure Disk,
Azure File, Portworx, and more. As other vendors develop storage drivers
for Kubernetes, they will be immediately available within Rancher 2.x.
Host Multitenancy
In Rancher 1.x, an environment was a collection of hosts. No host could
exist in more than one environment, and this delineation wasn’t always
appropriate. In Rancher 2.x, we have a cluster, which is a collection of
hosts and, within that cluster, you can have an infinite number of
environments that span those hosts. Each environment comes with its own
role-based access control (RBAC), for granular control over who can
execute actions in each environment. Now you can reduce your footprint
of hosts and consolidate resources within environments.
Single-Serving Containers
In Rancher 1.x, you had to deploy everything within a stack, even if it
was a single service with one container. In Rancher 2.x, the smallest
unit of deployment is a container, and you can deploy containers
individually if you wish. You can promote them into services within a
common stack or within their own stacks, or you can promote them to
global services, deployed on every host.
Afterthought Sidekicks
In Rancher 1.x, you had to define sidekicks at the time that you
launched the service. In Rancher 2.x, you can add sidekicks later and
attach them to any service.
Rapid Rollout of New Technology
When new technology like Istio or linkerd hits the community, we want to
support it as quickly as possible. In Rancher 1.x, there were times
where it was technologically impossible to support items because we were
built on top of Docker. By rebasing onto Kubernetes, we can quickly
deploy support for new technology and deliver on our promise of allowing
users to get right to work using technology without needing to do the
heavy lifting of installing and maintaining the solutions themselves.
Out-of-the-Box Metrics
In Rancher 1.x, you had to figure out how to monitor your services. We
have some monitoring extracted from Docker statistics, but it’s a
challenge to get those metrics out of Rancher and into something else.
Rancher 2.x ships with Heapster, InfluxDB, and Grafana, and these
provide per-node and per-pod metrics that are valuable for understanding
what’s going on in your environment. There are enhancements that you can
plug into these tools, like Prometheus and Elasticsearch, and those
enhancements have templates that make installation fast and easy.
Broader Catalog Support
The Catalog is one of the most popular items in Rancher, and it grows
with new offerings on a weekly basis. Kubernetes has its own
catalog-like service called Helm. In Rancher 1.x, if something wasn’t in
the Catalog, you had to build it yourself. In Rancher 2.x, we will
support our own Catalog, private catalogs, or Helm, giving you a greater
pool of pre-configured applications from which to choose.
We Still Support Compose
The option to import configuration from Docker Compose still exists.
This makes migrating into Rancher 2.x as easy as ever, either from a
Rancher 1.x environment or from a standalone Docker/Compose setup.
Phased Migration into Kubernetes
If you’re a community member who is interested in Kubernetes but has
shied away from it because of the learning curve, Rancher 2.x gives you
the ability to continue doing what you’re doing with Cattle and, at your
own pace, look at and understand how that translates to Kubernetes. You
can begin deploying Kubernetes resources directly when you’re ready.
What’s New for the Kubernetes Crowd?
If you’re part of our Kubernetes user base, or if you’re a Kubernetes
user who hasn’t yet taken Rancher for a spin, we have some surprises for
you as well.
Import Existing Kubernetes Clusters
This is one of the biggest new features in Rancher 2.x. If you like the
Rancher UI but already have Kubernetes clusters deployed elsewhere, you
can now import those clusters, as-is, into Rancher’s control and begin
to manage them and interact with them via our UI and API. This feature
is great for seamlessly migrating into Rancher, or for consolidating
management of disparate clusters across your business under a single
pane of glass.
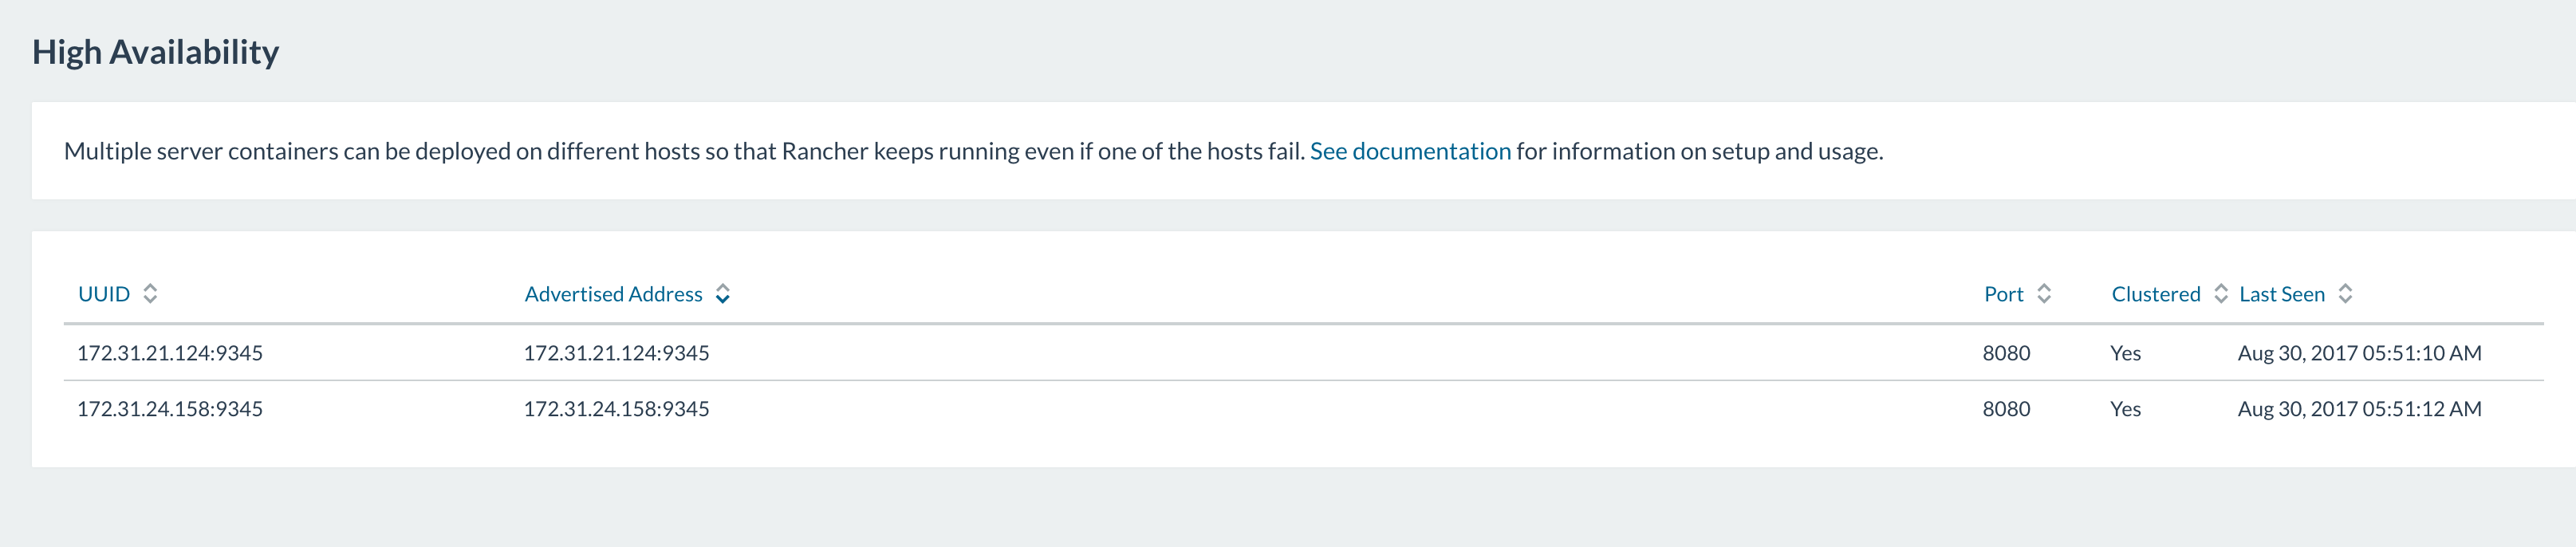
Instant HA
If you deploy the Rancher server in High Availability (HA) mode, you
instantly get HA for Kubernetes.
Full Kubernetes Access
In Rancher 1.x, you could only interact with Kubernetes via the means
that Kubernetes allows — kubectl or the Dashboard. We were
hands-off. In Rancher 2.x, you can interact with your Kubernetes
clusters vi the UI or API, or you can click the Advanced button,
grab the configuration for kubectl, and interact with them via that
means. The Kubernetes Dashboard is also available, secured behind
Rancher’s RBAC.
Compose Translation
Do you want to set up a deployment from a README that includes a sample
Compose file? In Rancher 2.x, you can take that Compose file and apply
it, and we’ll convert it into Kubernetes resources. This conversion
isn’t just a 1:1 translation of Compose directives; this is us
understanding the intended output of the Compose file and creating that
within Kubernetes.
It Really is This Awesome
I’ve been using Docker in production since 2013 and, during that time,
I’ve moved from straight Docker commands to an in-house deployment
utility that I wrote, to Docker Compose configs managed by Ansible, and
then to Rancher. Each of those stages in my progression were defined by
one requirement: the need to do more things faster and in a way that
could be automated. Rancher allows me to do 100x more than I could do
myself or with Compose, and removes the need for me to manage those
components. Over the year that I’ve been using Rancher, I’ve seen it
grow with one goal in mind: making things easy. Rancher 2.x steps up the
delivery of that goal with accomplishments that are amazing. Cattle
users still have the Cattle experience. Kubernetes users have greater
access to Kubernetes. Everyone has access to all the amazing work being
done by the community. Rancher still makes things easy and still
manages the
infrastructure
so that you can get right to deploying containers and getting work done.
I cannot wait to see where we go next.
About the Author
 Adrian Goins is a
field engineer for Rancher Labs who resides in Chile and likes to put
out fires in his free time. He loves Rancher so much that he can’t
contain himself.


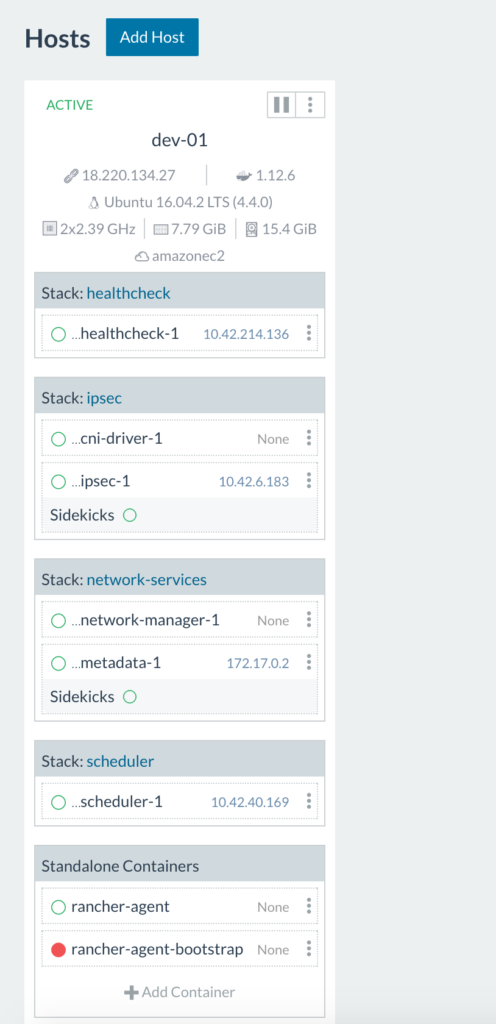
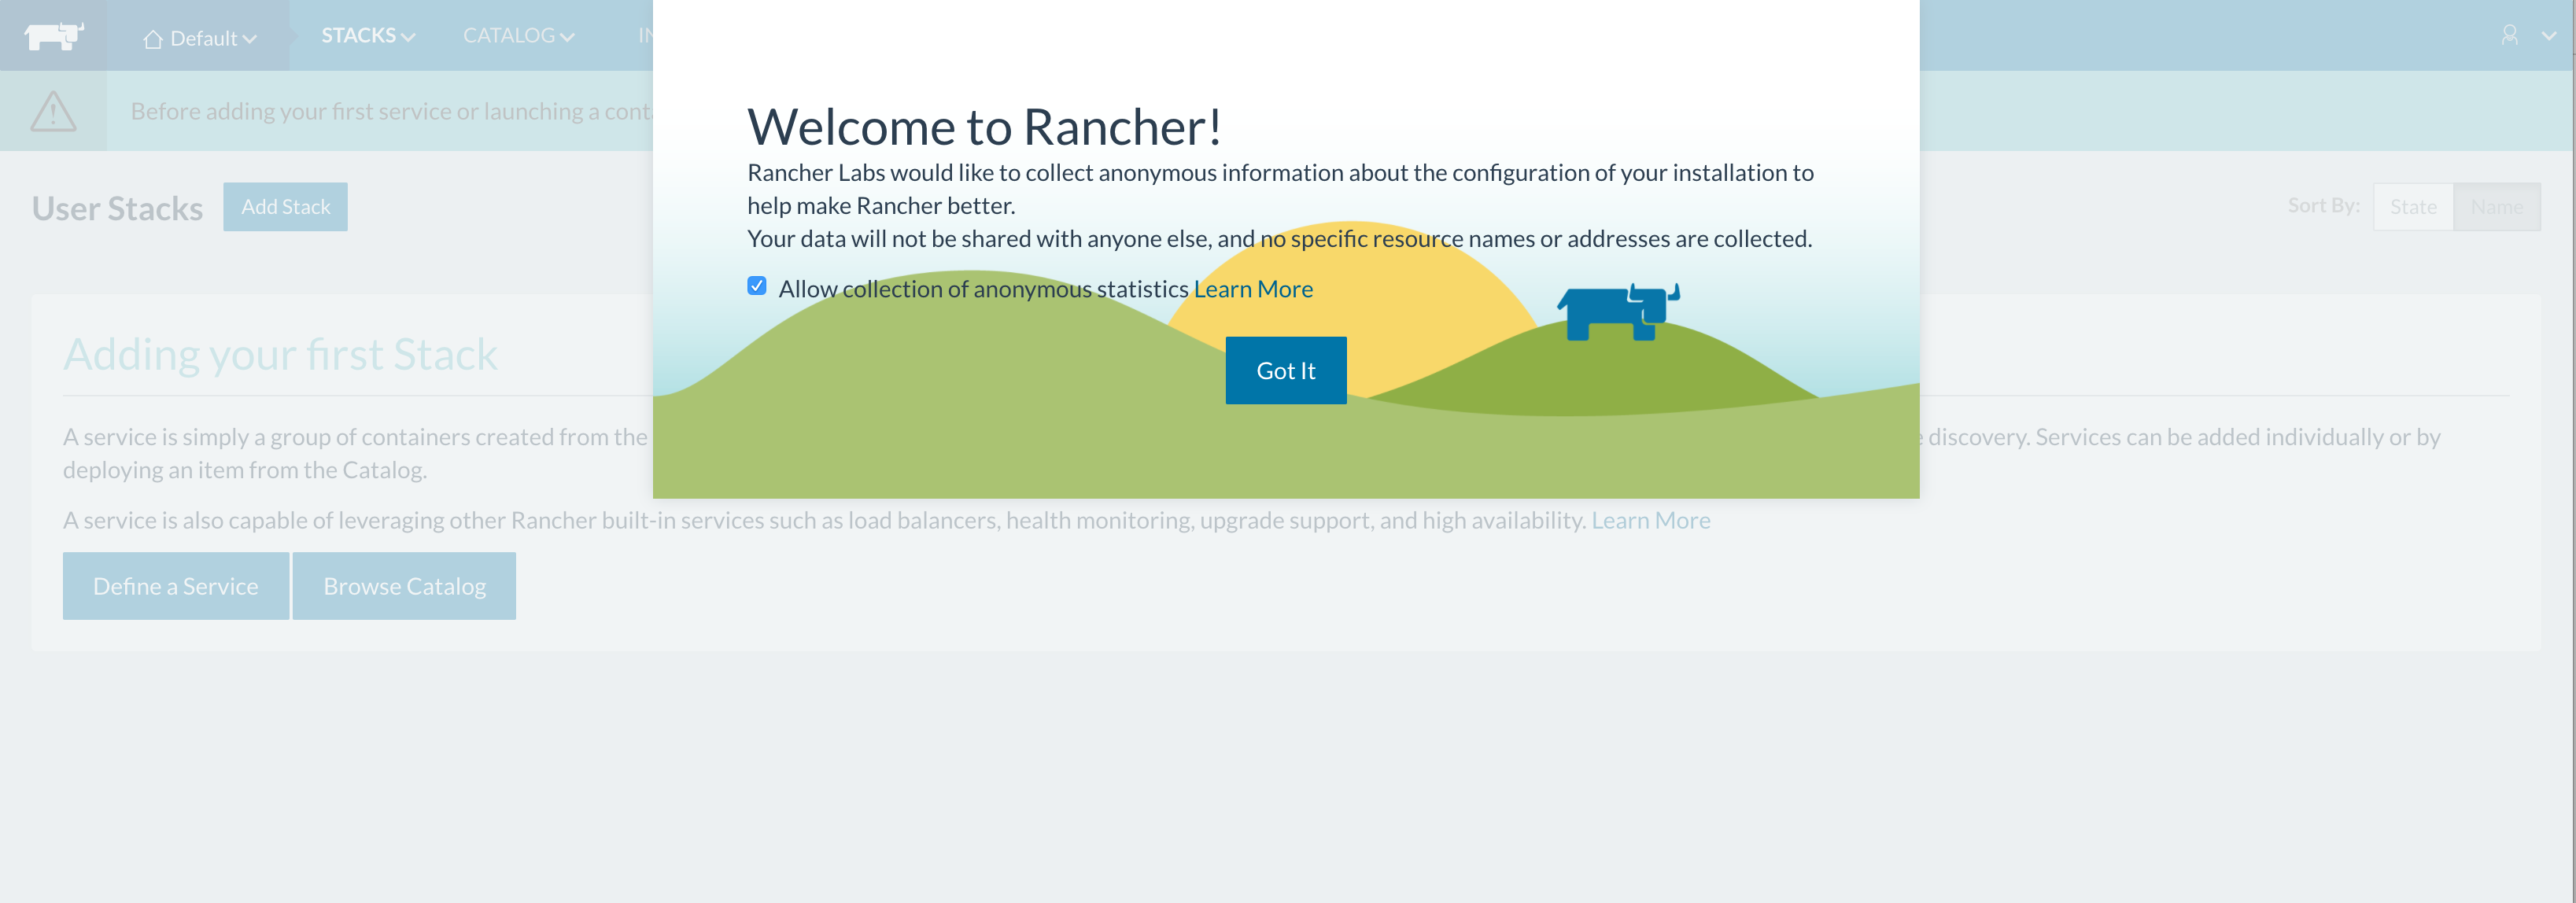 Since this is our initial set up, we need to add a host to our Rancher environment:
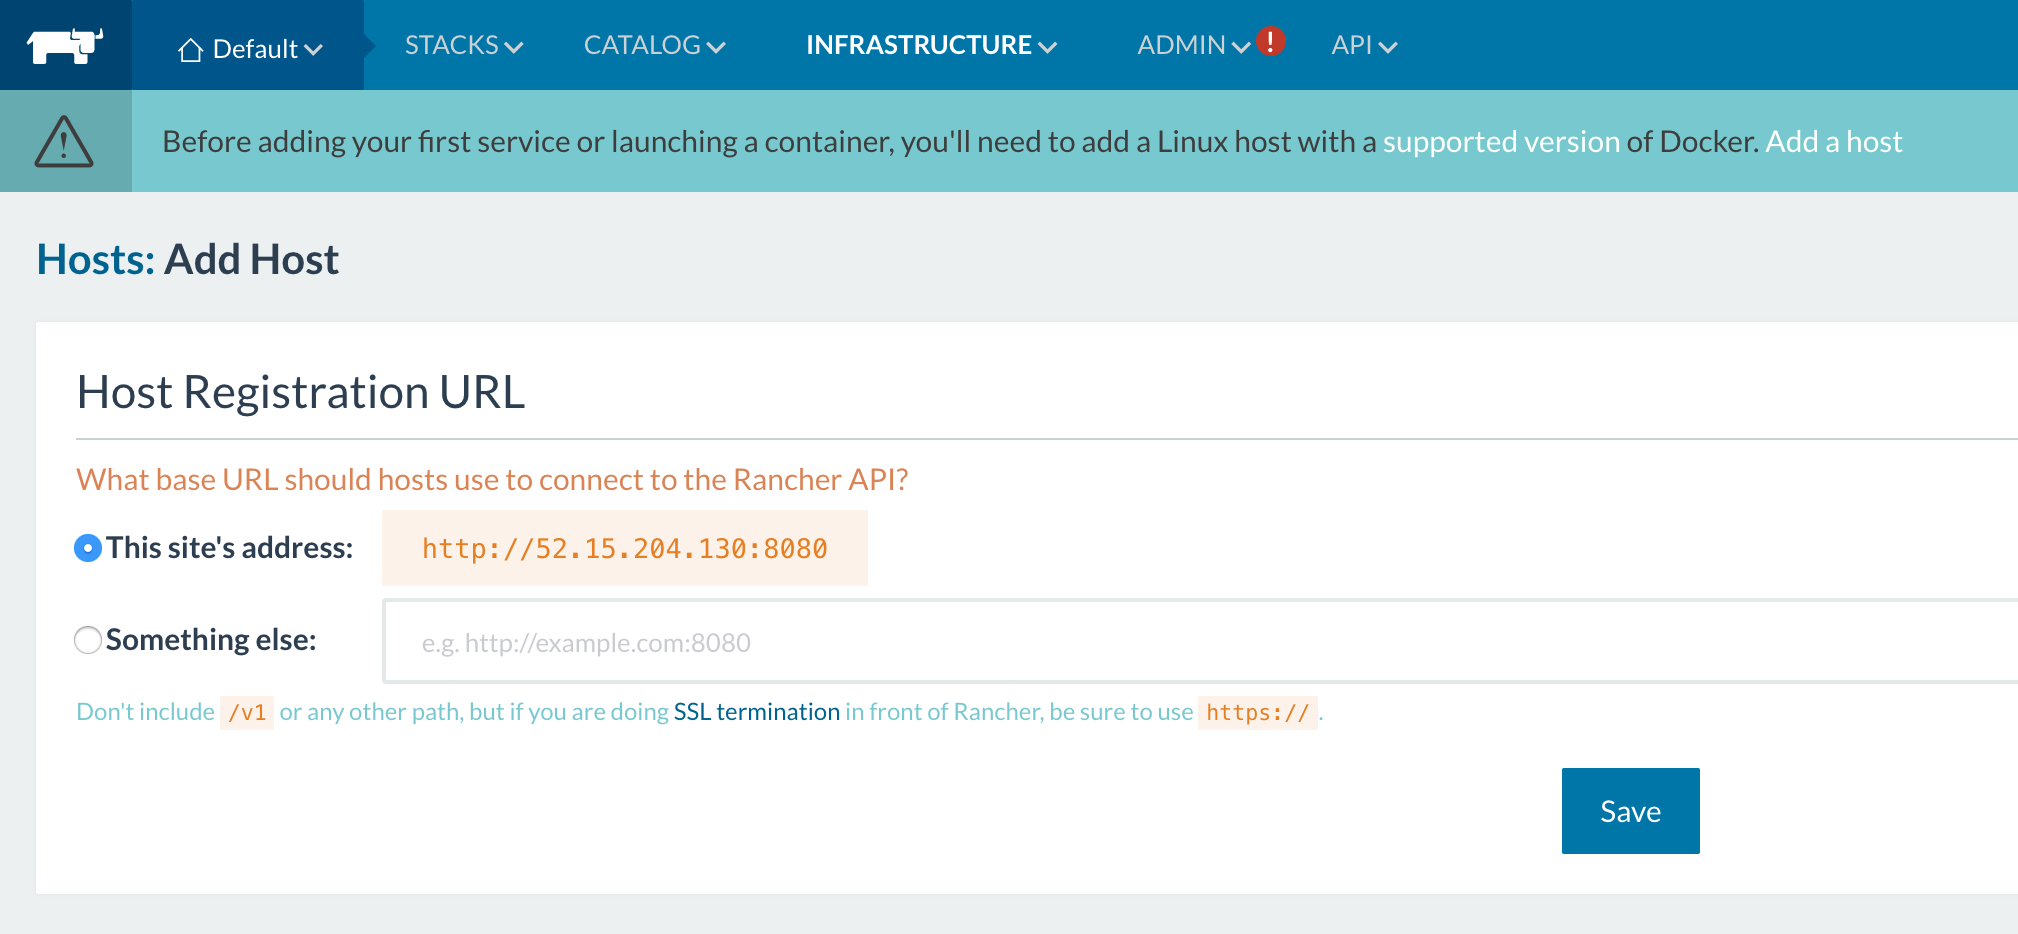
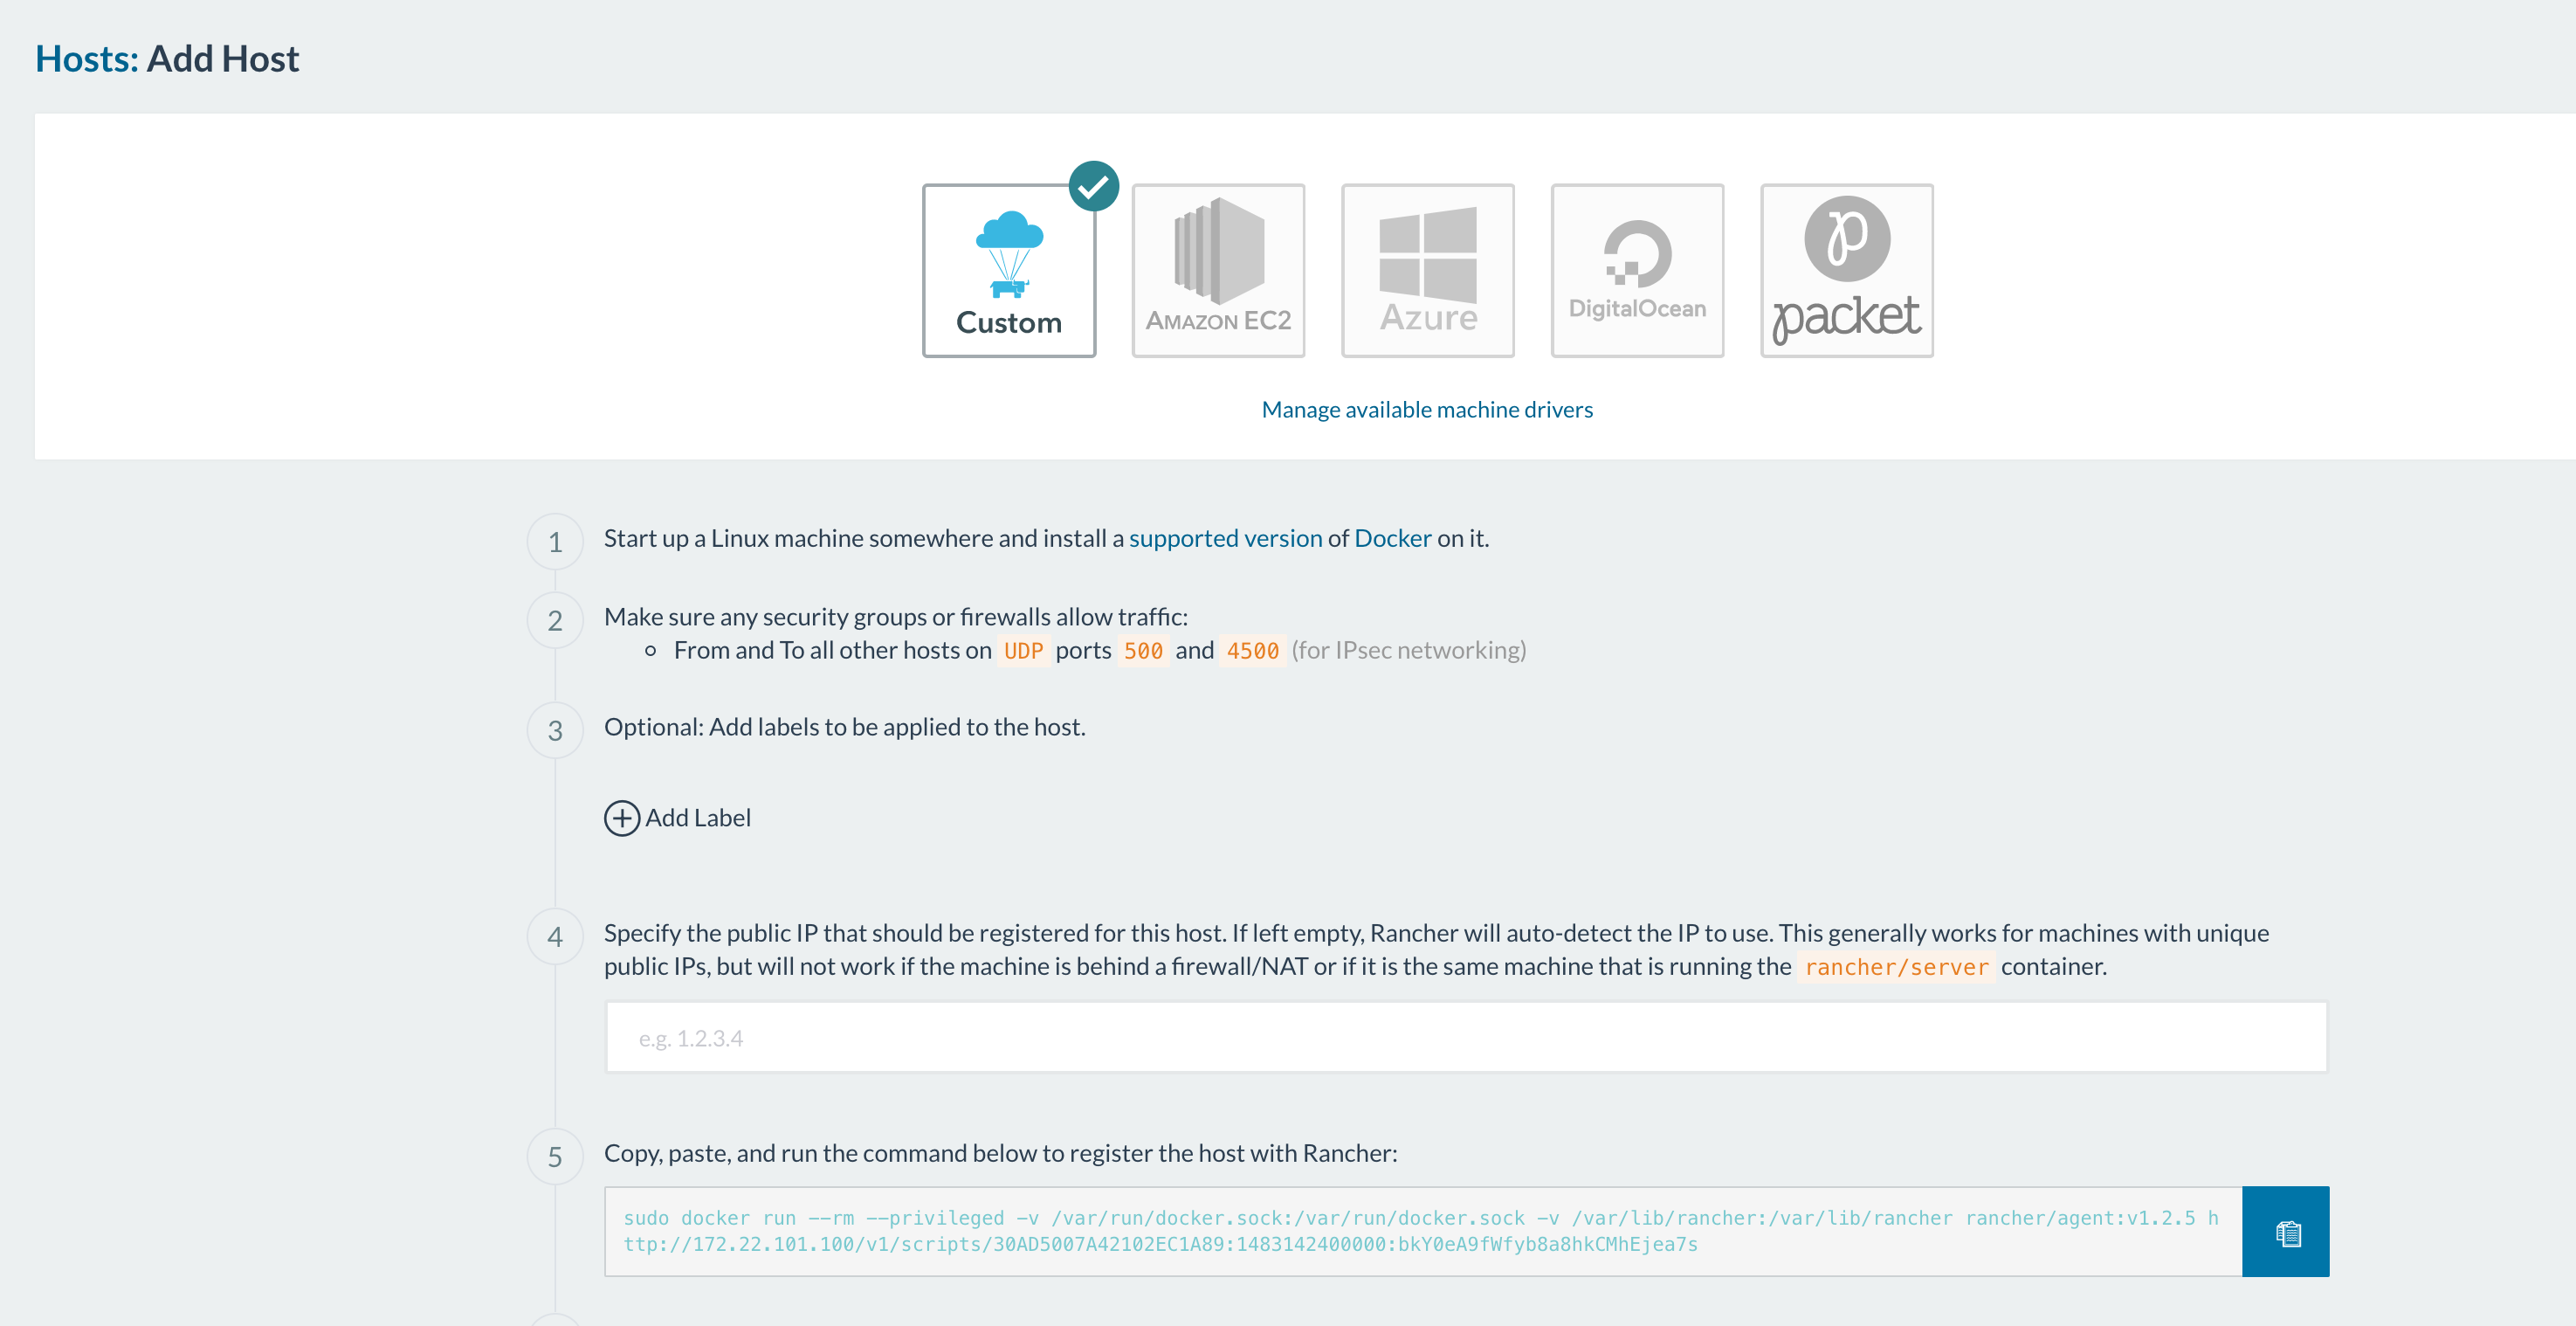 (note: the ports that have to been open for hosts to be able to communicate are 500 and


 It’s Rancher being unable to reach the database server or authenticate with the credentials we’ve provided it in our start up command. Take a look at networking settings, username and password and access privileges in the MySQL


 A
A One of the great
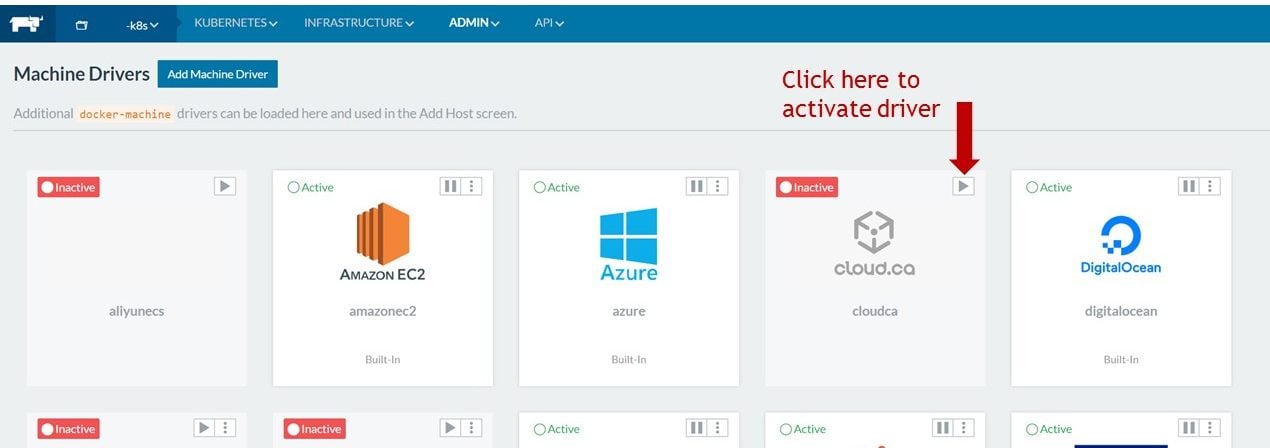 Click the > arrow to activate the
 Want to learn more about