Harvester Integrates with Rancher: What Does This Mean for You?

Thursday, 21 October, 2021

Thousands of new technology solutions are created each year, all designed to help serve the open source community of developers and engineers who build better applications. In 2014, Rancher was founded as a software solution aiming to help simplify the lives of engineers building applications in the new market of containers.

Today, Rancher is a market-leading, open source solution supported by a rich community helping thousands of global organizations deliver Kubernetes at scale.

Harvester is a new project from the SUSE Rancher team. It is a 100% open source, Hyperconverged Infrastructure (HCI) solution that offers the same expected integrations as traditional commercial solutions while also incorporating beneficial components of Kubernetes. Harvester is built on a foundation of cloud native technology to bridge the gap between traditional HCI and cloud native solutions.

Why Is This Significant? 

Harvester addresses the intersection of traditional HCI frameworks and modern containerization strategies. Developed by SUSE’s team of Rancher engineers, Harvester preserves the core values of Rancher. This includes enriching the open source community by creating Harvester as a 100% open, interoperable, and reliable HCI solution that fits any environment while retaining the traditional functions of HCI solutions. This helps users efficiently manage and operate their virtual machine workloads.

When Harvester is used with Rancher, it provides cloud native users with a holistic platform to manage new cloud native environments, including Kubernetes and containers alongside legacy Virtual Machine (VM) workloads. Rancher and Harvester together can help organizations modernize their IT environment by simplifying the operations and management of workloads across their infrastructure, reducing the amount of operational debt.

What Can We Expect in the Rancher & Harvester Integration?

There are a couple of significant updates in this v0.3.0 of Harvester with Rancher. The integration with Rancher v2.6.1 gives users extended usability across both platforms, including importing and managing multiple Harvester clusters using the Virtualization Management feature in Rancher v2.6.1. In addition, users can also leverage the authentication mechanisms and RBAC control for multi-tenancy support available in Rancher.  

Harvester users can now provision RKE & RKE2 clusters within Rancher v2.6.1 using the built-in Harvester Node Driver. Additionally, Harvester can now provide built-in Load Balancer support and raw cluster persistent storage support to guest Kubernetes clusters.  

Harvester remains on track to hit its general availability v1.0.0 release later this year.

Learn more about the Rancher and Harvester integration here.  

You can also check out additional feature releases in v0.3.0 of Harvester on GitHub or at harvesterhci.io.

How to Manage Harvester 0.3.0 with Rancher 2.6.1 Running in a VM within Harvester

Wednesday, 20 October, 2021

What I liked about the release of Harvester 0.2.0 was the ease of enabling the embedded Rancher server, which allowed you to create Kubernetes clusters in the same Harvester cluster.

With the release of Harvester 0.3.0, this option was removed in favor of installing Rancher 2.6.1 separately and then importing your Harvester cluster into Rancher, where you could manage it. A Harvester node driver is provided with Rancher 2.6.1 to allow you to create Kubernetes clusters in the same Harvester 0.3.0 cluster.

I replicated my Harvester 0.2.0 plus the Rancher server experience using Harvester 0.3.0 and Rancher 2.6.1.

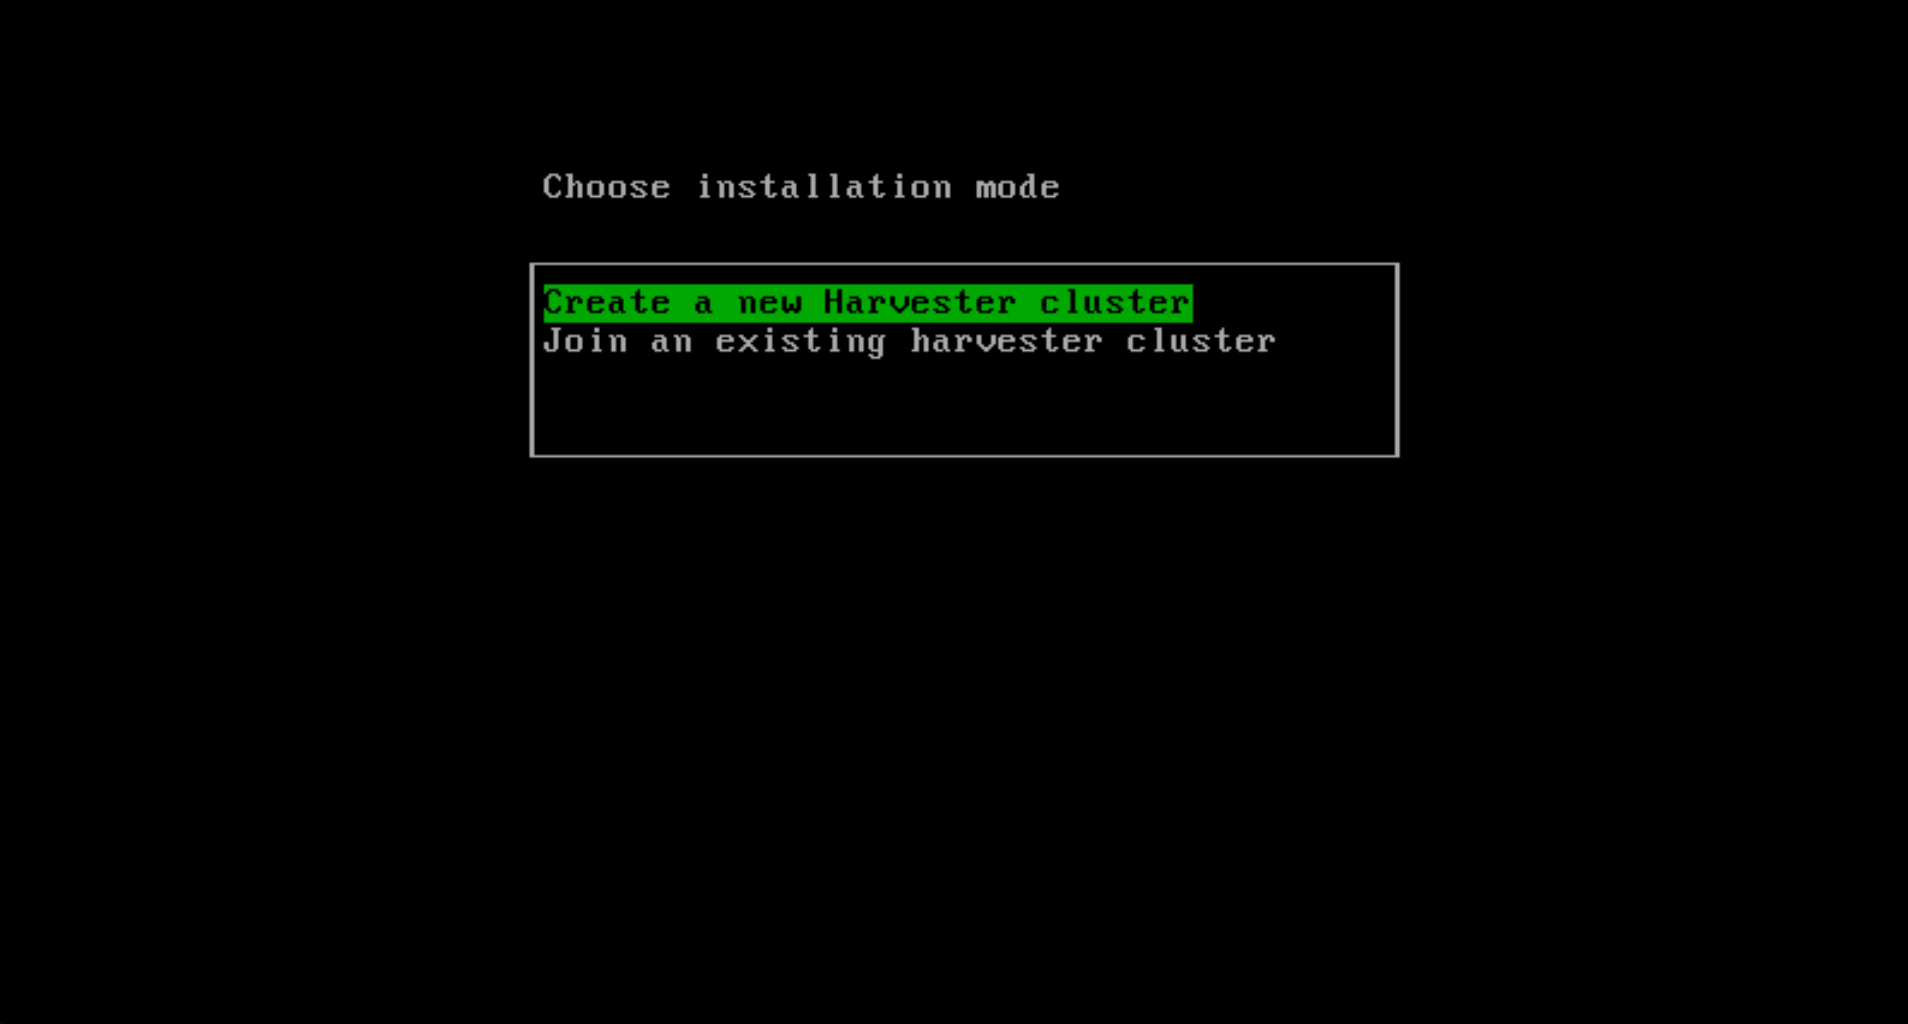
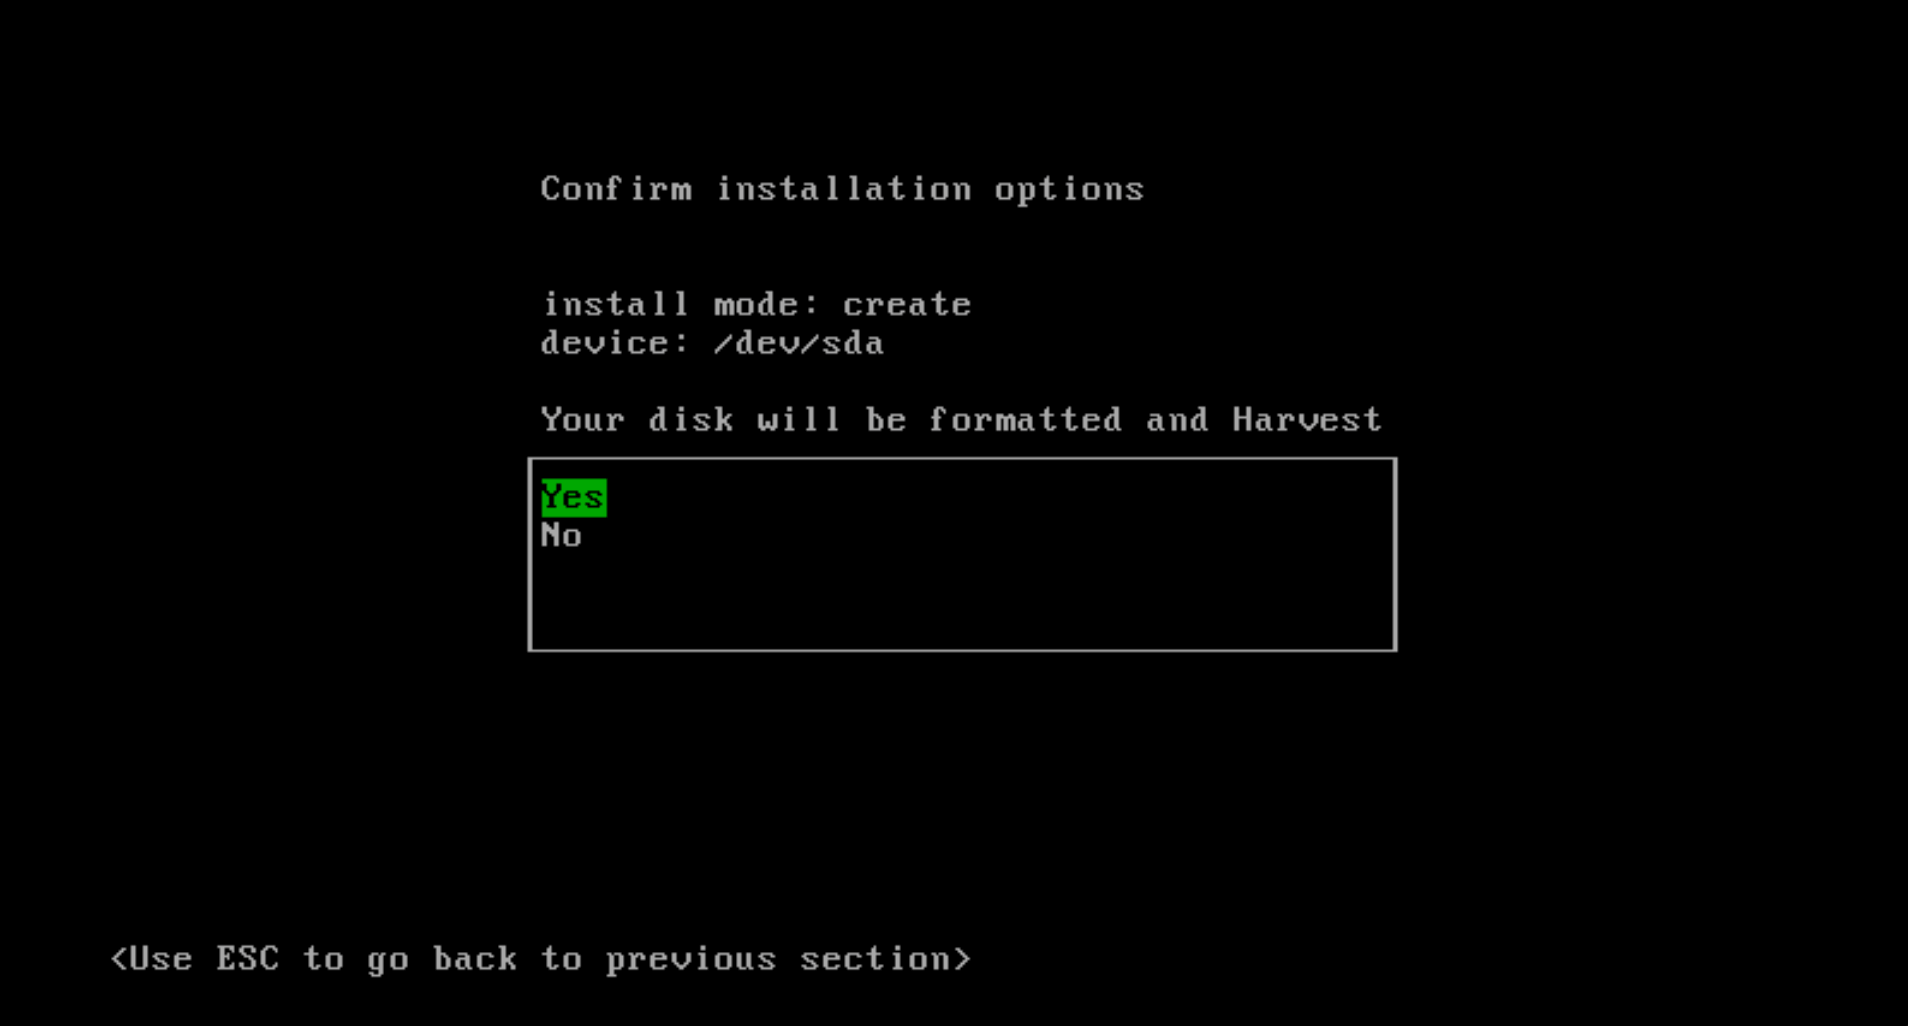
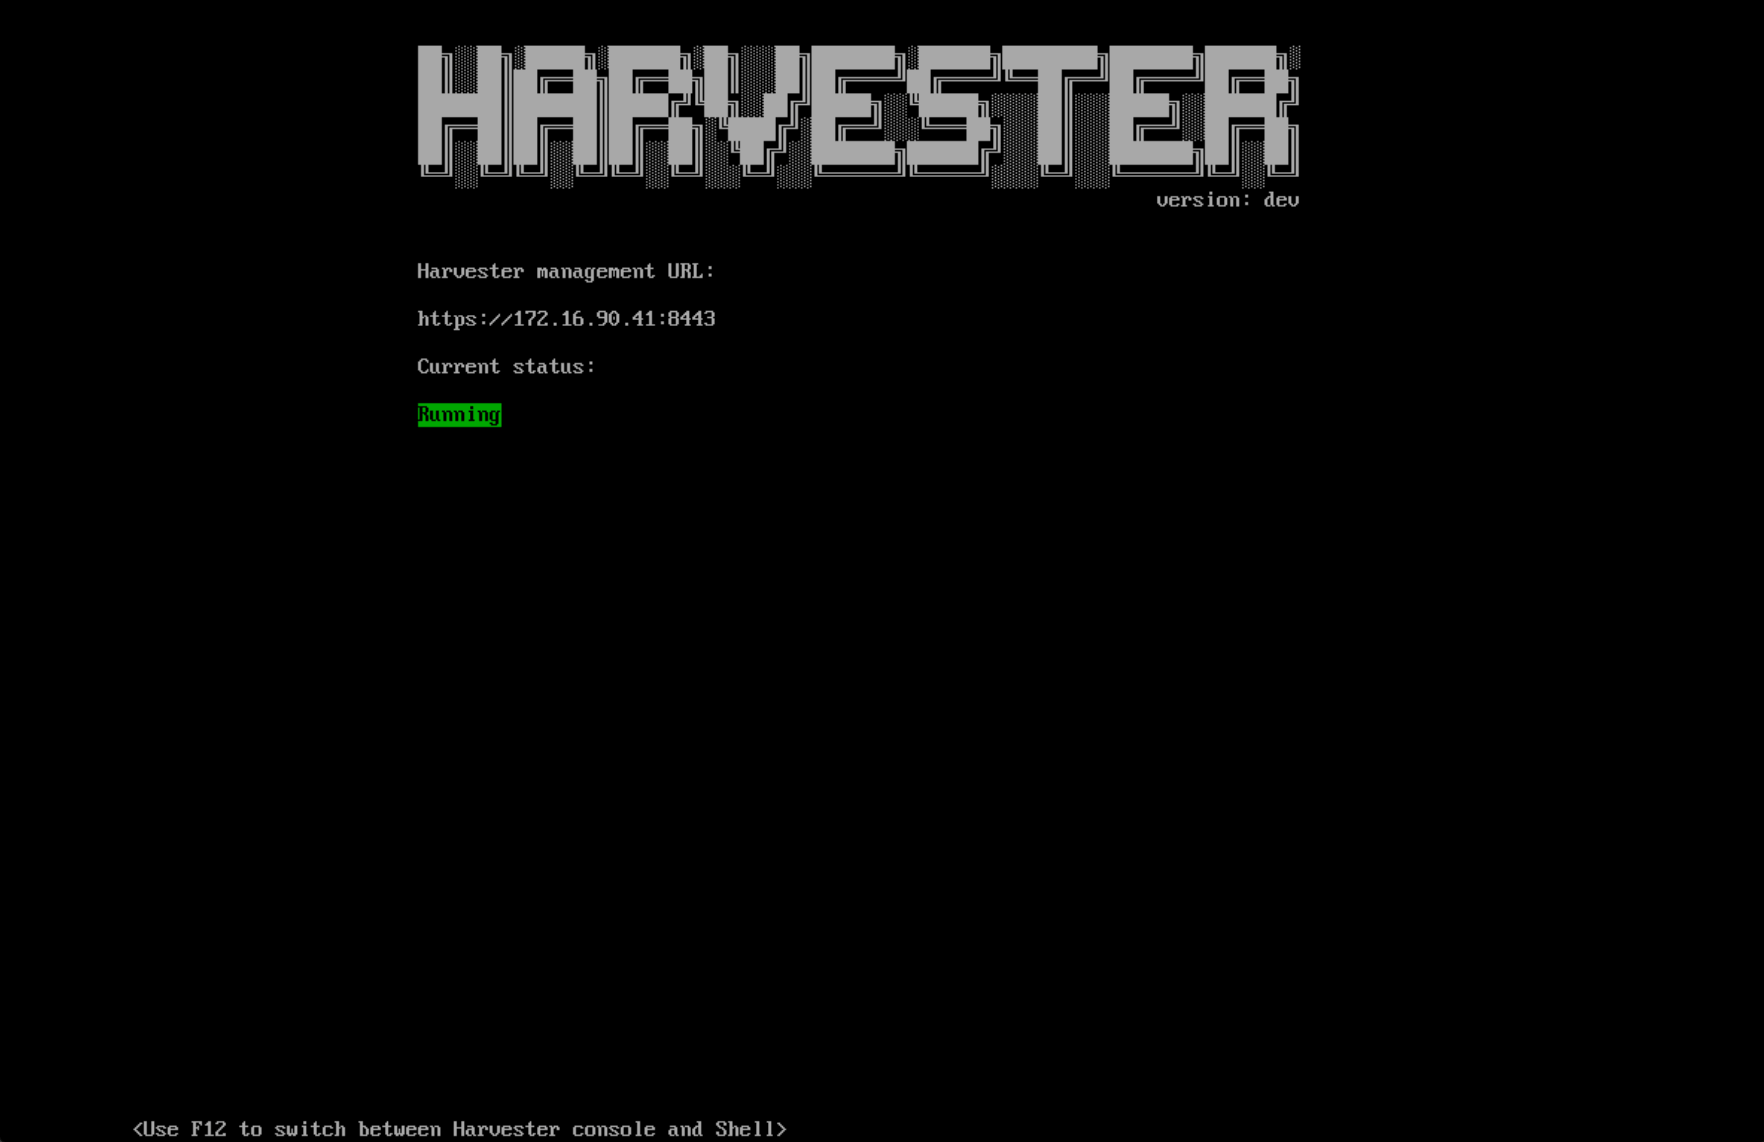
There’s no upgrade path from Harvester 0.2.0 to 0.3.0, so the first step was reinstalling my Intel NUC with Harvester 0.3.0 following the docs at: https://docs.harvesterhci.io/v0.3/install/iso-install/.

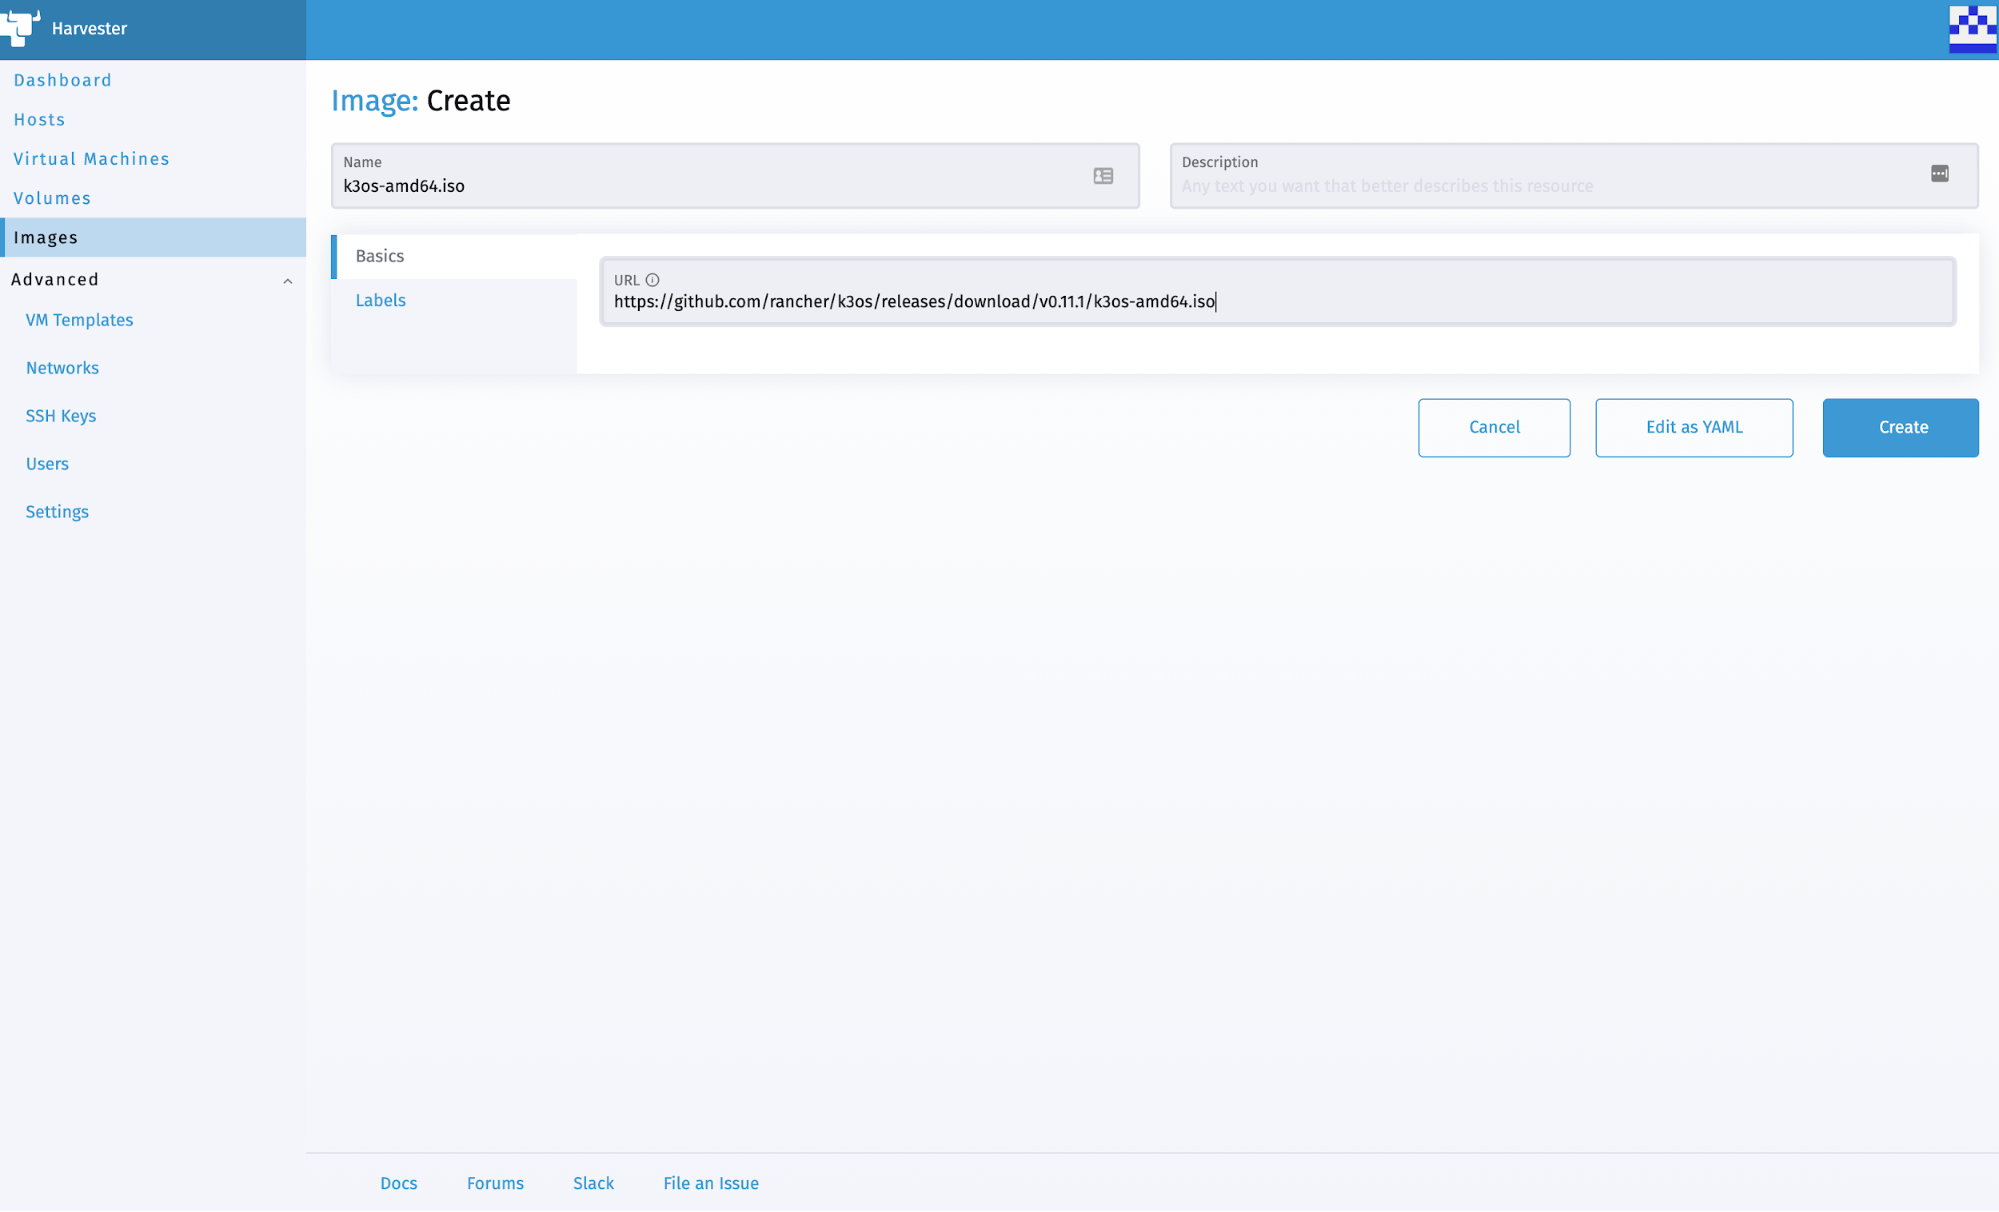
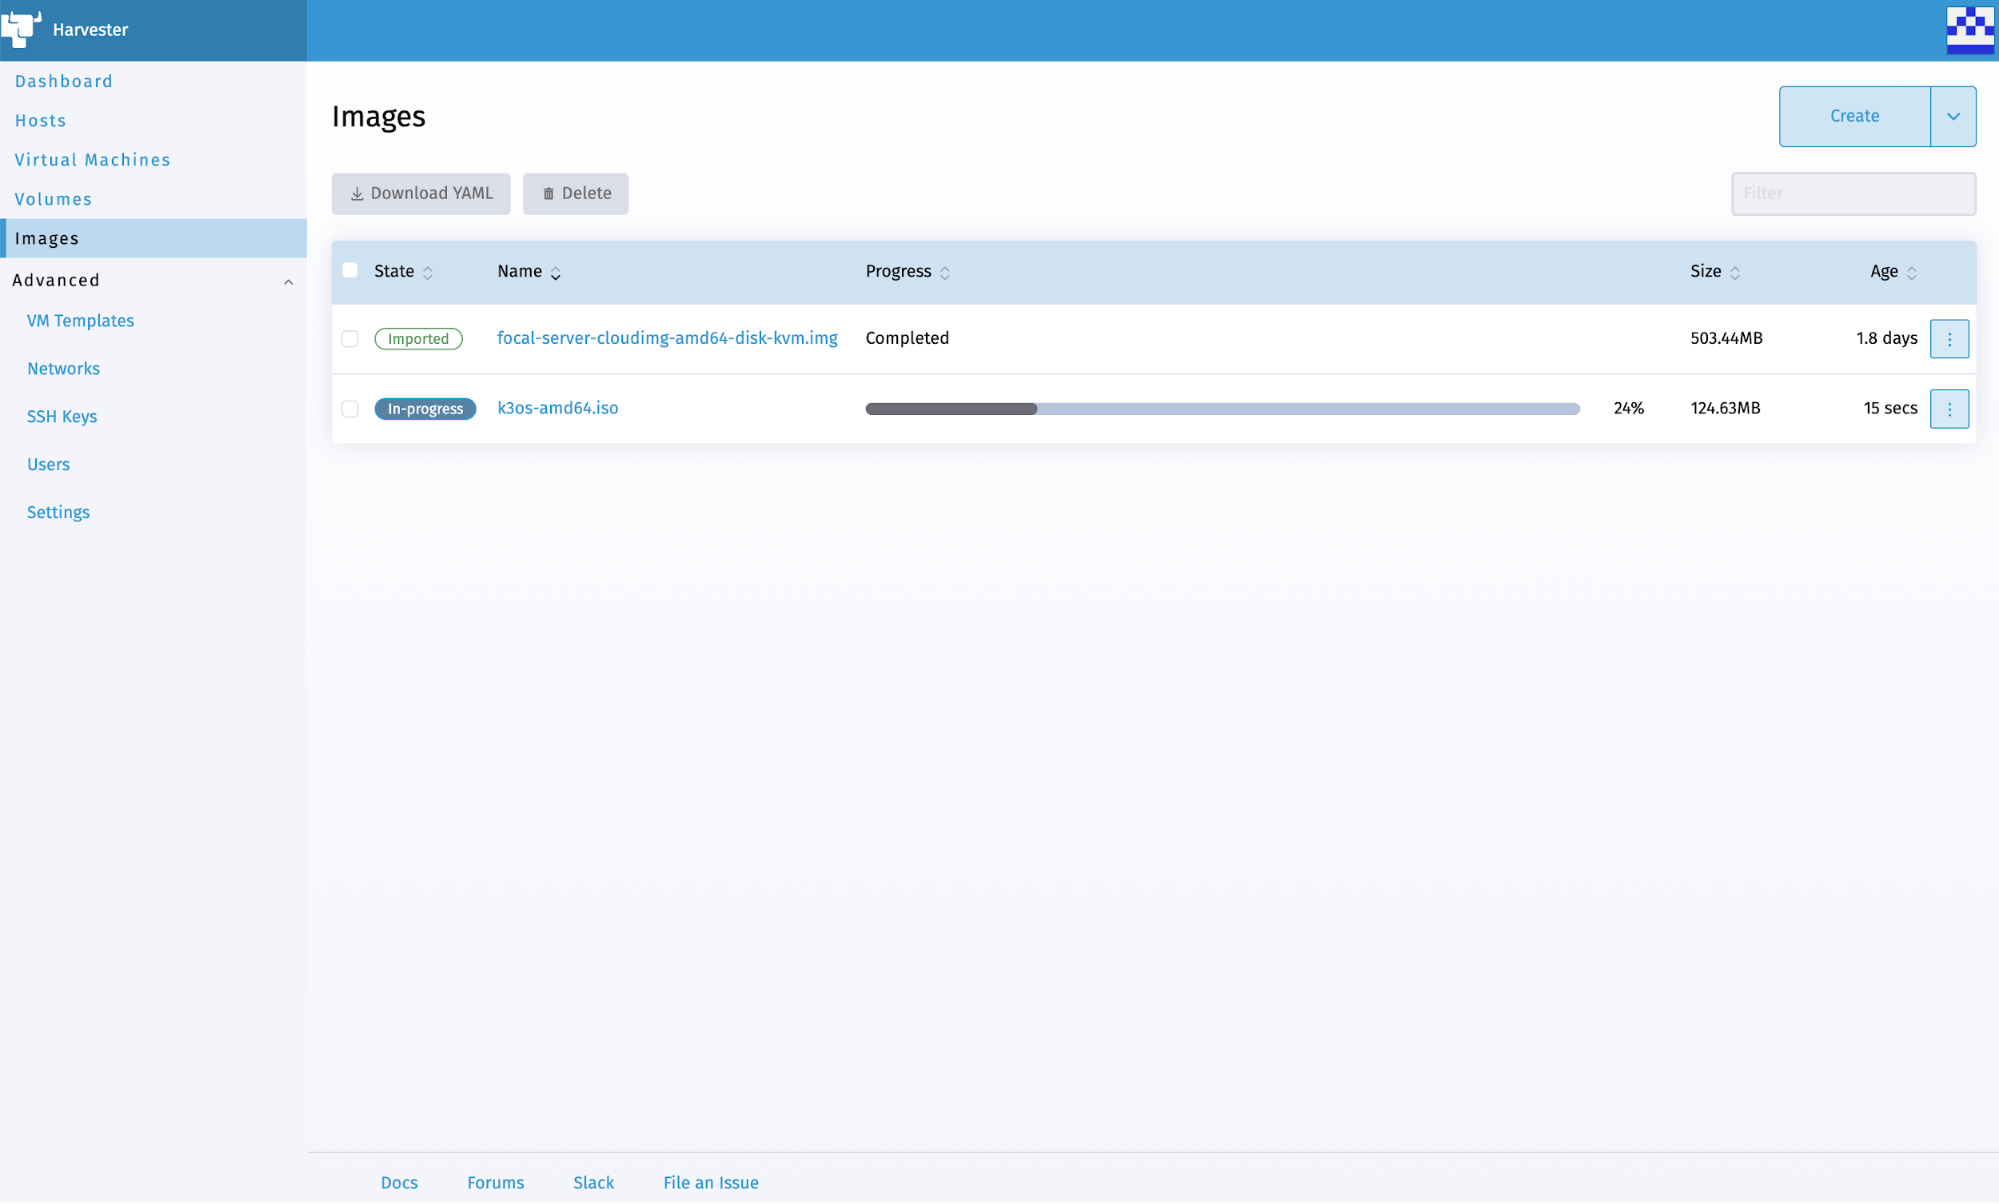
Given that my previous Harvester 0.2.0 install included Rancher, I figured I’d install Rancher in a VM running on my newly installed Harvester 0.3.0 node – but which OS would I use? With Rancher being deployed using a single Docker container, I was looking for a small, lightweight OS that included Docker. From past experience, I knew that openSUSE Leap had slimmed down images of its distribution available at https://get.opensuse.org/leap/ – click the alternative downloads link immediately under the initial downloads. Known as Just enough OS (JeOS), these are available for both Leap and Tumbleweed (their rolling release). I opted for Leap, so I created an image using the URL for the OpenStack Cloud image (trust me – the KVM and XEN image hangs on boot).

Knowing that I wanted to be able to access Rancher on the same network my Harvester node was attached to, I also enabled  Advanced | Settings | vlan (VLAN) and created a network using VLAN ID 1 (Advanced | Networks).

The next step is to install Rancher in a VM. While I could do this manually, I prefer automation and wanted to do something I could reliably repeat (something I did a lot while getting this working) and perhaps adapt when installing future versions. When creating a virtual machine, I was intrigued by the user data and network data sections in the advanced options tab, referenced in the docs at https://docs.harvesterhci.io/v0.3/vm/create-vm/, along with some basic examples. I knew from past experience that cloud-init could be used to initialize cloud instances, and with the openSUSE OpenStack Cloud images using cloud-init, I wondered if this could be used here. According to the examples in the cloud-init docs at https://cloudinit.readthedocs.io/en/latest/topics/examples.html, it can!

When creating the Rancher VM, I gave it 1 CPU with a 4-core NUC and Harvester 0.3.0 not supporting over-provisioning (it’s a bug – phew!) – I had to be frugal! Through trial and error, I also found that the minimum memory required for Rancher to work is 3 GB. I chose my openSUSE Leap 15.3 JeOS OpenStack Cloud image on the volumes tab, and on the networks tab, I chose my custom (VLAN 1) network.

The real work is done on the advanced options tab. I already knew JeOS didn’t include Docker, so that would need to be installed before I could launch the Docker container for Rancher. I also knew the keyboard wasn’t set up for me in the UK, so I wanted to fix that too. Plus, I’d like a message to indicate it was ready to use. I came up with the following User Data:

password: changeme
packages:
  - docker
runcmd:
  - localectl set-keymap uk
  - systemctl enable --now docker
  - docker run --name=rancher -d --restart=unless-stopped -p 80:80 -p 443:443 --privileged rancher/rancher:v2.6.1
  - until curl -sk https://127.0.0.1 -o /dev/null; do sleep 30s; done
final_message: Rancher is ready!

Let me go through the above lines:

  • Line 1 sets the password of the default opensuse user – you will be prompted to change this the first time you log in as this user, so don’t set it to anything secret!
  • Lines 2 & 3 install the docker package.
  • Line 4 says we’ll run some commands once it’s booted the first time.
  • Line 5 sets the UK keyboard.
  • Line 6 enables and starts the Docker service.
  • Line 7 pulls and runs the Docker container for Rancher 2.6.1 – this is the same line as the Harvester docs, except I’ve added “–name=rancher” to make it easier when you need to find the Bootstrap Password later.
    NOTE: When you create the VM, this line will be split into two lines with an additional preceding line with “>-” – it will look a bit different, but it’s nothing to worry about!
  • Line 8 is a loop checking for the Rancher server to become available – I test localhost, so it works regardless of the assigned IP address.
  • Line 9 prints out a message saying it’s finished (which happens after the previous loop completes).

An extra couple of lines will be automatically added when you click the create button but don’t click it yet as we’re not done!

This still left a problem with which IP address I use to access Rancher? With devices being assigned random IP addresses via DHCP, how do I control which address is used? Fortunately, the Network Data sections allow us to set a static address (and not have to mess with config files or run custom scripting within the VM):

network:
  version: 1
  config:
    - type: physical
      name: eth0
      subnets:
        - type: static
          address: 192.168.144.190/24
          gateway: 192.168.144.254
    - type: nameserver
      address:
        - 192.168.144.254
      search:
        - example.com

I won’t go through all the lines above but will call out those you need to change for your own network:

  • Line 8 sets the IP address to use with the CIDR netmask (/24 means 255.255.255.0).
  • Line 9 sets the default gateway.
  • Line 12 sets the default DNS nameserver.
  • Line 14 sets the default DNS search domain.

See https://cloudinit.readthedocs.io/en/latest/topics/network-config-format-v1.html# for information on the other lines.

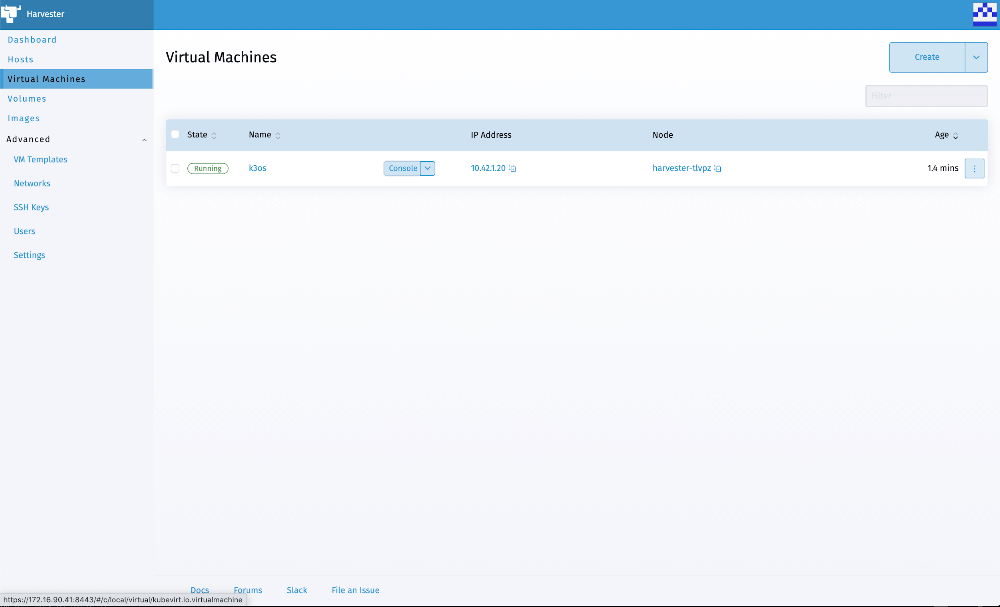
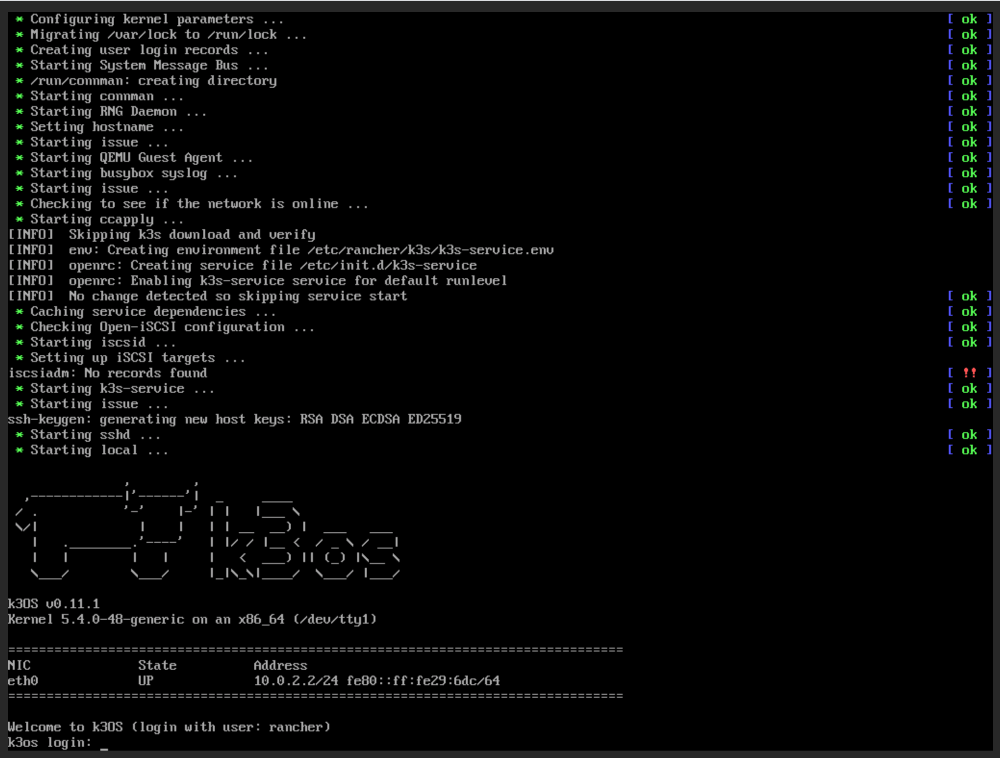
Unless you unticked the start virtual machine on creation, your VM should start booting once you click the Create button. If you open the Web Console in VNC, you’ll be able to keep an eye on the progress of your VM. When you see the message Rancher is ready, you can try accessing Rancher in a web browser at the IP address you specified above. Depending on the web browser you’re using and its configuration, you may see warning messages about the self-signed certificate Rancher is using.

The first time you log in to Rancher, you will be prompted for the random bootstrap password which was generated. To get this, you can SSH as the opensuse user to your Rancher VM, then run:

sudo docker logs rancher 2>&1 | grep "Bootstrap Password:"

Copy the password and paste it into the password field of the Rancher login screen, then click the login with Local User button.

You’re then prompted to set a password for the default admin user. Unless you can remember random strings or use a password manager, I’d set a specific password. You also need to agree to the terms and conditions for using Rancher!

Finally, you’re logged into Rancher, but we’re not entirely done yet as we need to add our Harvester cluster. To do this, click on the hamburger menu and then the Virtualization Management tab. Don’t panic if you see a failed whale error – just try reloading.

Clicking the Import Existing button will give you some registration commands to run on one of your Harvester node(s).

To do this, SSH to your Harvester node as the rancher user and then run the first kubectl command prefixed with sudo. Unless you’ve changed your Harvester installation, you’ll also need to run the curl command, again prefixing the kubectl command with sudo. The webpage should refresh, showing your Harvester cluster’s management page. If you click the Harvester Cluster link or tab, your Harvester cluster should be listed. Clicking on your cluster name should show something familiar!

Finally, we need to activate the Harvester node driver by clicking the hamburger menu and then the Cluster Management tab. Click Drivers, then Node Drivers, find Harvester in the list, and click Activate.

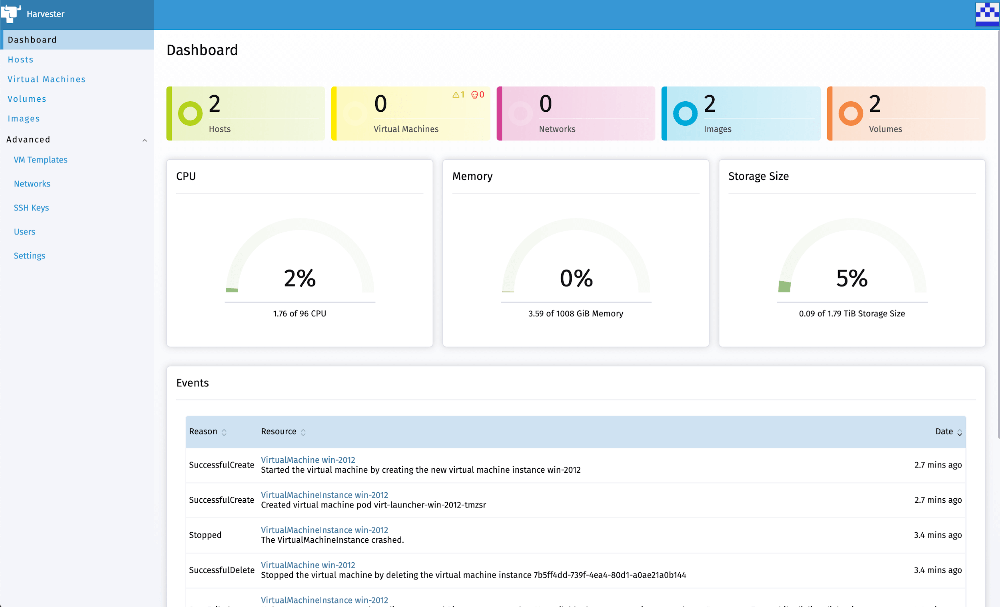
Now we have Harvester 0.3.0 integrated with Rancher 2.6.1, running similarly to Harvester 0.2.0, although sacrificing 1 CPU (which will be less of an issue once the CPU over-provisioning bug is fixed) and 3GB RAM.

Admittedly, running Rancher within a VM in the same Harvester you’re managing through Rancher doesn’t seem like the best plan, and you wouldn’t do it in production, but for the home lab, it’s fine. Just remember not to chop off the branch you’re standing on!

Nowości SUSE z konferencji KubeCon: projekty Harvester, Epinio, Kubewarden, Opni i Rancher Desktop

Monday, 11 October, 2021

SUSE na konferencji KubeCon North America poinformowała o istotnych postępach w pracach nad projektem Harvester i systemami open source udostępnionymi w wersjach beta. Harvester ujednolica dostarczanie maszyn wirtualnych i skonteneryzowanych obciążeń z poziomu programu SUSE Rancher. Z kolei by zapewnić produkcyjną jakości Kubernetesa w dowolnym miejscu, SUSE rozwija innowacyjne projekty open source Epinio, Kubewarden, Opni i Rancher Desktop udostępnione już w wersjach beta. 

Dzięki integracji oprogramowania SUSE Rancher z systemem Harvester powstało kompleksowe rozwiązanie open source do budowy infrastruktury hiperkonwergentnej (HCI). Dzięki niej firmy mogą przyspieszyć transformację cyfrową poprzez konsolidację, uproszczenie i modernizację dotychczasowych operacji IT. Od czasu przejęcia Rancher Labs w grudniu 2020 r. firma SUSE wzmocniła swoje zaangażowanie w rozwój innowacji w ramach swojego portfolio oprogramowania gotowego do pracy w chmurze (cloud-native), inwestując w projekty open source, takie jak Harvester, Epinio, Kubewarden, Opni i Rancher Desktop. Wszystkie te platformy są właśnie demonstrowane podczas konferencji KubeCon North America na stoisku firmy SUSE.

Infrastruktura hiperkonwergentna (HCI) zbudowana na open source do wdrażania rozwiązań cloud-native we własnym centrum danych oraz na brzegu sieci
Najważniejszą nowością SUSE prezentowaną podczas konferencji na KubeCon North America jest integracja narzędzia SUSE Rancher do zarządzania Kubernetesem z oprogramowaniem Harvester. Jest to rozwiązanie, które pomaga wdrażać w ujednolicony sposób zarówno maszyny wirtualne jak i kontenery, bez wprowadzania dodatkowej złożoności, narzucania ograniczeń czy generowania dodatkowych kosztów, z czym wiązało się korzystanie z rozwiązań tradycyjnych dostawców. Harvester został zaprojektowany z myślą o wykorzystaniu możliwości oprogramowania SUSE Rancher w zakresie ciągłego dostarczania (ang. Continous Delivery) w ramach GitOps do zarządzania potencjalnie tysiącami klastrów HCI. Klastry te mogą z pomocą Harverstera obsługiwać mieszankę maszyn wirtualnych (VM) i skonteneryzowanych obciążeń uruchomionych czy to we własnym centrum danych, czy jako rozwiązania Edge działające na brzegu sieci. Użytkownicy oprogramowania SUSE Rancher mogą teraz tworzyć klastry Kubernetesa na maszynach wirtualnych Harvestera. Z kolei Harvester może wykorzystać oprogramowanie SUSE Rancher do scentralizowanego uwierzytelniania użytkowników i zarządzania wieloma klastrami.

Uproszczenie zarządzania Kubernetesem i dostarczania aplikacji
SUSE ogłosiła też szereg kolejnych projektów open source, w tym:

  • Rancher Desktop: Sama instalacja Kubernetes została zaprojektowana tak, aby była prosta. Dodatkowa wiedza jest wymagana, gdy firma musi np. zresetować klaster w celu przetestowania aplikacji w różnych wersjach Kubernetesa. Rancher Desktop sprawia, że uruchamianie Kubernetesa i Dockera na lokalnym komputerze PC lub Mac jest znacznie łatwiejsze i znacznie szybciej można z nich zacząć korzystać.
  • Epinio: Oprogramowanie Epinio pozwala użytkownikom na przeprowadzenie aplikacji przez cały proces, od tworzenia kodu źródłowego do wdrożenia. Zaprojektowano je tak, aby umożliwić inżynierom pisanie kodu, który będzie wdrażany na Kubernetesie, bez marnowania czasu czy pieniędzy na uczenie wszystkich nowej platformy. Osiąga się to poprzez dostarczanie programistom odpowiednich poziomów abstrakcji, jednocześnie pozwalając operatorom na kontynuowanie pracy w środowisku, z którym czują się komfortowo.
  • Opni: Dane obserwowalne są częścią każdego środowiska Kubernetes, ale niewiele osób wykorzystuje je efektywnie do gromadzenia dostępnych informacji o stanie systemów operacyjnych i potencjalnych przestojach klastrów czy aplikacji. SUSE jest świetnie przygotowana do tego, aby zapewnić wykrywanie anomalii poprzez zastosowanie sztucznej inteligencji w ramach Kubernetesa za pośrednictwem rozwiązania Opni. Wykrywa ono anomalie w logach i metrykach klastra Kubernetes.
  • Kubewarden: Bezpieczeństwo pozostaje istotną barierą dla adopcji Kubernetesa, a najnowszy projekt firmy SUSE – Kubewarden – ma pomóc w usunięciu tej przeszkody. Zapewnia on znacznie większą elastyczność w porównaniu z innymi rozwiązaniami dostępnymi obecnie na rynku, ponieważ pozwala na pisanie polityk w dowolnym języku, który można skompilować do WebAssemblies (WASM), w tym w języku Rego wykorzystywanym w OPA (Open Policy Agent). Pozwala to zespołom operacyjnym i zarządzającym na skodyfikowanie zasad dotyczących tego, co może, a co nie może być uruchamiane w ich środowiskach. Polityki są dystrybuowane poprzez rejestry kontenerów, a obciążenia i polityki mogą być dystrybuowane i zabezpieczane w ten sam sposób – ostatecznie usuwając wąskie gardła, z którymi borykają się organizacje i redukując czas, jaki zespoły DevOps muszą poświęcić na przeglądanie polityk.

Więcej informacji na temat projektów open source SUSE można znaleźć na stronie community.suse.com/feed.

Harvester: Intro and Setup    

Tuesday, 17 August, 2021
I mentioned about a month back that I was using Harvester in my home lab. I didn’t go into much detail, so this post will bring some more depth. We will cover what Harvester does, as well as my hardware, installation, setup and how to deploy your first virtual machine. Let’s get started.

What is Harvester?

Harvester is Rancher’s open source answer to a hyperconverged infrastructure platform. Like most things Rancher is involved with, it is built on Kubernetes using tools like KubeVirt and Longhorn. KubeVirt is an exciting project that leverages KVM and libvirt to run virtual machines inside Kubernetes; this allows you to run both containers and VMs in your cluster. It reduces operational overhead and provides consistency. This combination of tried and tested technologies provides an open source solution in this space.

It is also designed to be used with bare metal, making it an excellent option for a home lab.

Hardware

If you check the hardware requirements, you will notice they focus more on business usage. So far, my personal experience says that you want at least a 4 core/8 thread CPU, 16GB of RAM, and a large SSD, preferably an NVMe drive. Anything less resource-wise doesn’t leave enough capacity for running many containers or VMs. I will install it on an Intel NUC 8i5BEK, which has an Intel Core i5-8259U. As far as RAM, it has 32GB of RAM and a 512GB NVMe drive. It can handle running Harvester without any issues. Of course, this is just my experience; your experience may differ.

Installation

Harvester ships as an ISO, which you can download on the GitHub Releases page. You can pull it quickly using wget.

$ wget https://releases.rancher.com/harvester/v0.2.0/harvester-amd64.iso

Once you have it downloaded, you will need to create a bootable USB. I typically use Balena Etcher since it is cross-platform and intuitive. Once you have a bootable USB, place it in the machine you want to use and boot the drive. This screen should greet you:

Select “New Cluster”:

Select the drive you want to use.

Enter your hostname, select your network interface, and make sure you use automatic DHCP.

You will then be prompted to enter your cluster token. This can be any phrase you want; I recommend using your password manager to generate one.

Set a password to use, and remember that the default user name is rancher.

The following several options are attractive, especially if you want to leverage your SSH keys used in GitHub. Since this is a home lab, I left the SSH keys, proxy and cloud-init setup blank. In an enterprise environment, this would be really useful. Now you will see the final screen before installation. Verify that everything is configured to your desires before proceeding.

If it all looks great, proceed with the installation. It will take a few minutes to complete; when it does, you will need to reboot.

After the reboot, the system will startup, and you will see a screen letting you know the URL for Harvester and the system’s status. Wait until it reports that Harvester is ready before trying to connect.

Great! It is now reporting that it is up and running, so it’s now time to set up Harvester.

Initial Setup

We can navigate to the URL listed once the OS boots. Mine is https://harvest:30443. It uses a self-signed certificate by default, so you will see a warning in your browser. Just click on “advanced” to proceed, and accept it. Set a password for the default admin account.

Now you should see the dashboard and the health of the system.

I like to disable the default account and add my own account for authentication. Probably not necessary for a home lab, but a good habit to get into. First, you need to navigate to it.

Now log out and back in with your new account. Once that’s finished, we can create our first VM.

Deploying Your First VM

Harvester has native support for qcow2 images and can import those from a URL. Let’s grab the URL for openSUSE Leap 15.3 JeOS image.

https://download.opensuse.org/distribution/leap/15.3/appliances/openSUSE-Leap-15.3-JeOS.x86_64-kvm-and-xen.qcow2

The JeOS image for openSUSE is roughly 225MB, which is a perfect size for downloading and creating VMs quickly. Let’s make the image in Harvester.

Create a new image, and add the URL above as the image URL.

You should now see it listed.

Now we can create a VM using that image. Navigate to the VM screen.

Once we’ve made our way to the VM screen, we’ll create a new VM.

When that is complete, the VM will show up in the list. Wait until it has been started, then you can start using it.

Wrapping Up

In this article, I wanted to show you how to set up VMs with Harvester, even starting from scratch! There are plenty of features to explore and plenty more on the roadmap. This project is still early in its life, so now is a great time to jump in and get involved with its direction.

Hyperconverged Infrastructure and Harvester

Monday, 2 August, 2021

Virtual machines (VMs) have transformed infrastructure deployment and management. VMs are so ubiquitous that I can’t think of a single instance where I deployed production code to a bare metal server in my many years as a professional software engineer.

VMs provide secure, isolated environments hosting your choice of operating system while sharing the resources of the underlying server. This allows resources to be allocated more efficiently, reducing the cost of over-provisioned hardware.

Given the power and flexibility provided by VMs, it is common to find many VMs deployed across many servers. However, managing VMs at this scale introduces challenges.

Managing VMs at Scale

Hypervisors provide comprehensive management of the VMs on a single server. The ability to create new VMs, start and stop them, clone them, and back them up are exposed through simple management consoles or command-line interfaces (CLIs).

But what happens when you need to manage two servers instead of one? Suddenly you find yourself having first to gain access to the appropriate server to interact with the hypervisor. You’ll also quickly find that you want to move VMs from one server to another, which means you’ll need to orchestrate a sequence of shutdown, backup, file copy, restore and boot operations.

Routine tasks performed on one server become just that little bit more difficult with two, and quickly become overwhelming with 10, 100 or 1,000 servers.

Clearly, administrators need a better way to manage VMs at scale.

Hyperconverged Infrastructure

This is where Hyperconverged Infrastructure (HCI) comes in. HCI is a marketing term rather than a strict definition. Still, it is typically used to describe a software layer that abstracts the compute, storage and network resources of multiple (often commodity or whitebox) servers to present a unified view of the underlying infrastructure. By building on top of the virtualization functionality included in all major operating systems, HCI allows many systems to be managed as a single, shared resource.

With HCI, administrators no longer need to think in terms of VMs running on individual servers. New hardware can be added and removed as needed. VMs can be provisioned wherever there is appropriate capacity, and operations that span servers, such as moving VMs, are as routine with 2 servers as they are with 100.

Harvester

Harvester, created by Rancher, is open source HCI software built using Kubernetes.

While Kubernetes has become the defacto standard for container orchestration, it may seem like an odd choice as the foundation for managing VMs. However, when you think of Kubernetes as an extensible orchestration platform, this choice makes sense.

Kubernetes provides authentication, authorization, high availability, fault tolerance, CLIs, software development kits (SDKs), application programming interfaces (APIs), declarative state, node management, and flexible resource definitions. All of these features have been battle tested over the years with many large-scale clusters.

More importantly, Kubernetes orchestrates many kinds of resources beyond containers. Thanks to the use of custom resource definitions (CRDs), and custom operators, Kubernetes can describe and provision any kind of resource.

By building on Kubernetes, Harvester takes advantage of a well tested and actively developed platform. With the use of KubeVirt and Longhorn, Harvester extends Kubernetes to allow the management of bare metal servers and VMs.

Harvester is not the first time VM management has been built on top of Kubernetes; Rancher’s own RancherVM is one such example. But these solutions have not been as popular as hoped:

We believe the reason for this lack of popularity is that all efforts to date to manage VMs in container platforms require users to have substantial knowledge of container platforms. Despite Kubernetes becoming an industry standard, knowledge of it is not widespread among VM administrators.

To address this, Harvester does not expose the underlying Kubernetes platform to the end user. Instead, it presents more familiar concepts like VMs, NICs, ISO images and disk volumes. This allows Harvester to take advantage of Kubernetes while giving administrators a more traditional view of their infrastructure.

Managing VMs at Scale

The fusion of Kubernetes and VMs provides the ability to perform common tasks such as VM creation, backups, restores, migrations, SSH-Key injection and more across multiple servers from one centralized administration console.

Consolidating virtualized resources like CPU, memory, network, and storage allows for greater resource utilization and simplified administration, allowing Harvester to satisfy the core premise of HCI.

Conclusion

HCI abstracts the resources exposed by many individual servers to provide administrators with a unified and seamless management interface, providing a single point to perform common tasks like VM provisioning, moving, cloning, and backups.

Harvester is an HCI solution leveraging popular open source projects like Kubernetes, KubeVirt, and Longhorn, but with the explicit goal of not exposing Kubernetes to the end user.

The end result is an HCI solution built on the best open source platforms available while still providing administrators with a familiar view of their infrastructure.

Download Harvester from the project website and learn more from the project documentation.

Meet the Harvester developer team! Join our free Summer is Open session on Harvester: Tuesday, July 27 at 12pm PT and on demand. Get details about the project, watch a demo, ask questions and get a challenge to complete offline.

Announcing Harvester Beta Availability

Friday, 28 May, 2021

It has been five months since we announced project Harvester, open source hyperconverged infrastructure (HCI) software built using Kubernetes. Since then, we’ve received a lot of feedback from the early adopters. This feedback has encouraged us and helped in shaping Harvester’s roadmap. Today, I am excited to announce the Harvester v0.2.0 release, along with the Beta availability of the project!

Let’s take a look at what’s new in Harvester v0.2.0.

Raw Block Device Support

We’ve added the raw block device support in v0.2.0. Since it’s a change that’s mostly under the hood, the updates might not be immediately obvious to end users. Let me explain more in detail:

In Harvester v0.1.0, the image to VM flow worked like this:

  1. Users added a new VM image.

  2. Harvester downloaded the image into the built-in MinIO object store.

  3. Users created a new VM using the image.

  4. Harvester created a new volume, and copied the image from the MinIO object store.

  5. The image was presented to the VM as a block device, but it was stored as a file in the volume created by Harvester.

This approach had a few issues:

  1. Read/write operations to the VM volume needed to be translated into reading/writing the image file, which performed worse compared to reading/writing the raw block device, due to the overhead of the filesystem layer.

  2. If one VM image is used multiple times by different VMs, it was replicated many times in the cluster. This is because each VM had its own copy of the volume, even though the majority of the content was likely the same since they’re coming from the same image.

  3. The dependency on MinIO to store the images resulted in Harvester keeping MinIO highly available and expandable. Those requirements caused an extra burden on the Harvester management plane.

In v0.2.0, we’ve took another approach to tackle the problem, which resulted in a simpler solution that had better performance and less duplicated data:

  1. Instead of an image file on the filesystem, now we’re providing the VM with raw block devices, which allows for better performance for the VM.

  2. We’ve taken advantage of a new feature called Backing Image in the Longhorn v1.1.1, to reduce the unnecessary copies of the VM image. Now the VM image will be served as a read-only layer for all the VMs using it. Longhorn is now responsible for creating another copy-on-write (COW) layer on top of the image for the VMs to use.

  3. Since now Longhorn starts to manage the VM image using the Backing Image feature, the dependency of MinIO can be removed.

Image 02
A comprehensive view of images in Harvester

From the user experience perspective, you may have noticed that importing an image is instantaneous. And starting a VM based on a new image takes a bit longer due to the image downloading process in Longhorn. Later on, any other VMs using the same image will take significantly less time to boot up, compared to the previous v0.1.0 release and the disk IO performance will be better as well.

VM Live Migration Support

In preparation for the future upgrade process, VM live migration is now supported in Harvester v0.2.0.

VM live migration allows a VM to migrate from one node to another, without any downtime. It’s mostly used when you want to perform maintenance work on one of the nodes or want to balance the workload across the nodes.

One thing worth noting is, due to potential IP change of the VM after migration when using the default management network, we highly recommend using the VLAN network instead of the default management network. Otherwise, you might not be able to keep the same IP for the VM after migration to another node.

You can read more about live migration support here.

VM Backup Support

We’ve added VM backup support to Harvester v0.2.0.

The backup support provides a way for you to backup your VM images outside of the cluster.

To use the backup/restore feature, you need an S3 compatible endpoint or NFS server and the destination of the backup will be referred to as the backup target.

You can get more details on how to set up the backup target in Harvester here.

Image 03
Easily manage and operate your virtual machines in Harvester

In the meantime, we’re also working on the snapshot feature for the VMs. In contrast to the backup feature, the snapshot feature will store the image state inside the cluster, providing VMs the ability to revert back to a previous snapshot. Unlike the backup feature, no data will be copied outside the cluster for a snapshot. So it will be a quick way to try something experimental, but not ideal for the purpose of keeping the data safe if the cluster went down.

PXE Boot Installation Support

PXE boot installation is widely used in the data center to automatically populate bare-metal nodes with desired operating systems. We’ve also added the PXE boot installation in Harvester v0.2.0 to help users that have a large number of servers and want a fully automated installation process.

You can find more information regarding how to do the PXE boot installation in Harvester v0.2.0 here.

We’ve also provided a few examples of doing iPXE on public bare-metal cloud providers, including Equinix Metal. More information is available here.

Rancher Integration

Last but not least, Harvester v0.2.0 now ships with a built-in Rancher server for Kubernetes management.

This was one of the most requested features since we announced Harvester v0.1.0, and we’re very excited to deliver the first version of the Rancher integration in the v0.2.0 release.

For v0.2.0, you can use the built-in Rancher server to create Kubernetes clusters on top of your Harvester bare-metal clusters.

To start using the built-in Rancher in Harvester v0.2.0, go to Settings, then set the rancher-enabled option to true. Now you should be able to see a Rancher button on the top right corner of the UI. Clicking the button takes you to the Rancher UI.

Harvester and Rancher share the authentication process, so once you’re logged in to Harvester, you don’t need to redo the login process in Rancher and vice versa.

If you want to create a new Kubernetes cluster using Rancher, you can follow the steps here. A reminder that VLAN networking needs to be enabled for creating Kubernetes clusters on top of the Harvester, since the default management network cannot guarantee a stable IP for the VMs, especially after reboot or migration.

What’s Next?

Now with v0.2.0 behind us, we’re working on the v0.3.0 release, which will be the last feature release before Harvester reaches GA.

We’re working on many things for v0.3.0 release. Here are some highlights:

  • Built-in load balancer
  • Rancher 2.6 integration
  • Replace K3OS with a small footprint OS designed for the container workload
  • Multi-tenant support
  • Multi-disk support
  • VM snapshot support
  • Terraform provider
  • Guest Kubernetes cluster CSI driver
  • Enhanced monitoring

You can get started today and give Harvester v0.2.0 a try via our website.

Let us know what you think via the Rancher User Slack #harvester channel. And start contributing by filing issues and feature requests via our github page.

Enjoy Harvester!

Announcing Harvester: Open Source Hyperconverged Infrastructure (HCI) Software

Wednesday, 16 December, 2020

Today, I am excited to announce project Harvester, open source hyperconverged infrastructure (HCI) software built using Kubernetes. Harvester provides fully integrated virtualization and storage capabilities on bare-metal servers. No Kubernetes knowledge is required to use Harvester.

Why Harvester?

In the past few years, we’ve seen many attempts to bring VM management into container platforms, including our own RancherVM, and other solutions like KubeVirt and Virtlet. We’ve seen some demand for solutions like this, mostly for running legacy software side by side with containers. But in the end, none of these solutions have come close to the popularity of industry-standard virtualization products like vSphere and Nutanix.

We believe the reason for this lack of popularity is that all efforts to date to manage VMs in container platforms require users to have substantial knowledge of container platforms. Despite Kubernetes becoming an industry standard, knowledge of it is not widespread among VM administrators. They are familiar with concepts like ISO images, disk volumes, NICs and VLANS – not concepts like pods and PVCs.

Enter Harvester.

Project Harvester is an open source alternative to traditional proprietary hyperconverged infrastructure software. Harvester is built on top of cutting-edge open source technologies including Kubernetes, KubeVirt and Longhorn. We’ve designed Harvester to be easy to understand, install and operate. Users don’t need to understand anything about Kubernetes to use Harvester and enjoy all the benefits of Kubernetes.

Harvester v0.1.0

Harvester v0.1.0 has the following features:

Installation from ISO

You can download ISO from the release page on Github and install it directly on bare-metal nodes. During the installation, you can choose to create a new cluster or add the current node into an existing cluster. Harvester will automatically create a cluster based on the information you provided.

Install as a Helm Chart on an Existing Kubernetes Cluster

For development purposes, you can install Harvester on an existing Kubernetes cluster. The nodes must be able to support KVM through either hardware virtualization (Intel VT-x or AMD-V) or nested virtualization.

VM Lifecycle Management

Powered by KubeVirt, Harvester supports creating/deleting/updating operations for VMs, as well as SSH key injection and cloud-init.

Harvester also provides a graphical console and a serial port console for users to access the VM in the UI.

Storage Management

Harvester has a built-in highly available block storage system powered by Longhorn. It will use the storage space on the node, to provide highly available storage to the VMs inside the cluster.

Networking Management

Harvester provides several different options for networking.

By default, each VM inside Harvester will have a management NIC, powered by Kubernetes overlay networking.

Users can also add additional NICs to the VMs. Currently, VLAN is supported.

The multi-network functionality in Harvester is powered by Multus.

Image Management

Harvester has a built-in image repository, allowing users to easily download/manage new images for the VMs inside the cluster.

The image repository is powered by MinIO.

Image 01

Install

To install Harvester, just load the Harvester ISO into your bare-metal machine and boot it up.

Image 02

For the first node where you install Harvester, select Create a new Harvester cluster.

Later, you will be prompted to enter the password that will be used to enter the console on the host, as well as “Cluster Token.” The Cluster Token is a token that’s needed later by other nodes that want to join the same cluster.

Image 03

Then you will be prompted to choose the NIC that Harvester will use. The selected NIC will be used as the network for the management and storage traffic.

Image 04

Once everything has been configured, you will be prompted to confirm the installation of Harvester.

Image 05

Once installed, the host will be rebooted and boot into the Harvester console.

Image 06

Later, when you are adding a node to the cluster, you will be prompted to enter the management address (which is shown above) as well as the cluster token you’ve set when creating the cluster.

See here for a demo of the installation process.

Alternatively, you can install Harvester as a Helm chart on your existing Kubernetes cluster, if the nodes in your cluster have hardware virtualization support. See here for more details. And here is a demo using Digital Ocean which supports nested virtualization.

Usage

Once installed, you can use the management URL shown in the Harvester console to access the Harvester UI.

The default user name/password is documented here.

Image 07

Once logged in, you will see the dashboard.

Image 08

The first step to create a virtual machine is to import an image into Harvester.

Select the Images page and click the Create button, fill in the URL field and the image name will be automatically filled for you.

Image 09

Then click Create to confirm.

You will see the real-time progress of creating the image on the Images page.

Image 10

Once the image is finished creating, you can then start creating the VM using the image.

Select the Virtual Machine page, and click Create.

Image 11

Fill in the parameters needed for creation, including volumes, networks, cloud-init, etc. Then click Create.

VM will be created soon.

Image 12

Once created, click the Console button to get access to the console of the VM.

Image 13

See here for a UI demo.

Current Status and Roadmap

Harvester is in the early stages. We’ve just released the v0.1.0 (alpha) release. Feel free to give it a try and let us know what you think.

We have the following items in our roadmap:

  1. Live migration support
  2. PXE support
  3. VM backup/restore
  4. Zero downtime upgrade

If you need any help with Harvester, please join us at either our Rancher forums or Slack, where our team hangs out.

If you have any feedback or questions, feel free to file an issue on our GitHub page.

Thank you and enjoy Harvester!

Nowości SUSE w systemach Linux i do zarządzania wirtualizacją, środowiskami cloud-native i platformami edge

Wednesday, 19 June, 2024

Na SUSECON 2024 w Berlinie SUSE ogłosiła wprowadzenie nowych funkcjonalności w swojej ofercie infrastruktury IT dla przedsiębiorstw opartej na systemach Linux, technologiach cloud-native i rozwiązaniach brzegowych. Pomogą one klientom uwolnić nieskończony potencjał oprogramowania open source wykorzystywanego do wspierania działalności przedsiębiorstw.

Generatywna sztuczna inteligencja, technologie cloud native i edge na nowo definiują sposoby, w jaki przedsiębiorstwa tworzą i obsługują aplikacje w chmurze, środowiska brzegowe i te działające lokalnie. Nowe możliwości oprogramowania SUSE wspierają organizacje w procesach transformacji ich działalności, zapewniając szybszy czas uzyskania wartości i niższe koszty operacyjne.

„Możliwość dokonywania różnych wyborów w dzisiejszym złożonym środowisku IT jest niezwykle istotna. Jednocześnie niedawna konsolidacja rynku pozbawia wielu użytkowników swobody w doborze rozwiązań” – powiedział dr Thomas Di Giacomo, dyrektor ds. technologii i produktów w firmie SUSE. „Dzięki naszemu unikalnemu, otwartemu i zorientowanemu na ekosystem podejściu, SUSE podtrzymuje swoje wieloletnie zobowiązanie do zapewniania klientom elastyczności, której potrzebują w swojej infrastrukturze w centrum danych, aby osiągać jak najlepsze wyniki”.


Rozwiązania Business Critical Linux (BCL)

Systemy Linux obsługują obecnie najważniejsze aplikacje przedsiębiorstw. SUSE Linux Enterprise od zawsze był preferowanym systemem dla organizacji poszukujących elastyczności, niezawodności i swobody wyboru w kształtowaniu swojej infrastruktury IT. SUSE niezmiennie wprowadza innowacje i pomaga zwiększać wydajność przedsiębiorstw dostarczający im systemy Linux przygotowane do potrzeb biznesu. Chociaż wiele innych firm twierdzi, że oferuje poufne obliczenia, kluczowe pytanie dotyczy kompleksowych możliwości zapewniających maksymalne bezpieczeństwo i zgodność z przepisami. SUSE Linux umacnia swoją pozycję lidera w dziedzinie poufnych obliczeń dzięki najnowszym wersjom systemów SUSE Linux Enterprise i SUSE Manager oraz obsłudze technologii Intel TDX (Trust Domain Extensions) i AMD SEV (Secure Encrypted Virtualization), w tym dla instancji obliczeniowych hiperskalerów, oraz zdalnemu poświadczaniu za pomocą narzędzia SUSE Manager. Dziś firma SUSE ogłosiła następujące ulepszenia, innowacje i plany rozwoju:

  • SUSE Linux Enterprise Server 15 Service Pack 6: Wraz z tą aktualizacją, SUSE zabezpiecza na przyszłość środowiska IT klientów wprowadzając nowy pakiet Long Term Service Pack Support Core. Zapewni on najdłuższy na rynku okres wsparcia technicznego dla systemów Linux klasy korporacyjnej, kończący się dopiero w 2037 roku. SUSE Linux Enterprise 15 Service Pack 6 (SP6), zaprojektowany z myślą o uproszczeniu operacji IT w centrum danych, chmurze i na brzegu sieci (edge), obniża ryzyko i koszty wdrażania nowych technologii oraz zapewnia ciągłość biznesową, minimalizując planowane i nieplanowane przerwy w świadczeniu usług. Zawiera zaktualizowaną wersję jądra 6.4 i nowe biblioteki, w tym OpenSSL 3.1. Zbudowany w oparciu o certyfikowany łańcuch dostaw bezpiecznego oprogramowania i zgodny z najwyższymi standardami, SUSE Linux Enterprise gwarantuje bezpieczeństwo zgodne z najsurowszymi przepisami.
  • SUSE Linux Enterprise Server for SAP Applications 15 SP6: SUSE Linux Enterprise Server for SAP Applications 15 SP6 to najpopularniejsza, bezpieczna i niezawodna platforma linuksowa dla klientów i partnerów SAP do obsługi najważniejszych aplikacji SAP, od centrum danych po chmurę. Ta wersja zapewnia również dostęp do najnowszych innowacji w Trento, aplikacji open source opracowanej przez SUSE, umożliwiającej lepszą ochronę infrastruktury SAP poprzez diagnozowanie typowych błędów w konfiguracji i sprawdzanie systemów pod kątem najlepszych praktyk SUSE.
  • SUSE Linux Enterprise Micro 6.0: SUSE Linux Enterprise Micro 6.0 to niezmienny (immutable), lekki i bezpieczny system operacyjny typu host o otwartym kodzie źródłowym, zoptymalizowany pod kątem kontenerowych i zwirtualizowanych obciążeń roboczych. Upraszcza samodzielne wdrożenia kontenerów, idealnie nadaje się do urządzeń wbudowanych i zintegrowanych, a jednocześnie zapewnia stabilną platformę do wdrożeń Kubernetesa. W tym wydaniu wprowadzono obsługę pełnego szyfrowania dysków, zwiększając bezpieczeństwo danych klientów, zarówno w centrum danych, jak i poza nim. Zaprojektowany do pracy w dowolnym miejscu, SUSE Linux Enterprise Micro 6.0 umożliwia organizacjom przekraczanie ograniczeń geograficznych i operacyjnych, jednocześnie dostosowując się do różnych scenariuszy wdrażania.
  • SUSE Manager 5.0: Obsługując ponad 16 różnych dystrybucji systemu Linux, SUSE Manager 5.0 jest wiodącym w branży rozwiązaniem do zarządzania wieloma systemami Linux. Umożliwia zautomatyzowane zarządzanie poprawkami i zgodnością w dowolnych systemach Linux z poziomu jednej konsoli, w dowolnym miejscu i na dowolną skalę. Sam SUSE Manager jest skonteneryzowany w celu zwiększenia odporności, skalowalności i przenoszalności, a także uproszczenia procesu instalacji. W tym wydaniu dodano również funkcje zdalnego poświadczania dla SUSE Linux Enterprise Server 15 SP6, aby zapewnić klientom możliwość udowodnienia, że ich zdalne środowiska IT działają w środowisku Confidential Computing w celu zwiększenia zgodności z przepisami.

SUSE pozostaje w pełni zaangażowana w rozwój platformy SUSE Linux Enterprise Server i już teraz pracuje nad zestawem kolejnych innowacji w systemach Enterprise Linux. W 2025 r.  wprowadzi na rynek kolejne główne wydanie swojej flagowej platformy Linux dla biznesu, czyli w SUSE Linux Enterprise Server 16 i SUSE Linux Enterprise Server for SAP Applications 16.

Rozwiązania Enterprise Container Management (ECM)

Wraz ze wzrostem popularności Kubernetesa i konteneryzacji w zastosowaniach biznesowych, użytkownicy potrzebują narzędzi do prowadzenia bezpiecznych i skalowalnych operacji z wykorzystaniem technologii cloud native. Rozwiązania SUSE wspomagają modernizację środowisk IT firm, umożliwiając im szybsze wprowadzanie innowacji i zabezpieczenie infrastruktury na przyszłość. Aby zaspokoić rosnące zapotrzebowanie, SUSE wprowadza ulepszenia do swojej oferty zarządzania kontenerami, obserwowalności całego środowiska, bezpieczeństwa kontenerów i wirtualizacji.

  • Rancher Prime 3.1 – Wersja 3.1 rozszerza obsługę sztucznej inteligencji o aprowizację wirtualnych klastrów, wspiera współdzielenie klastrów bez kompromisów w zakresie izolacji i optymalizuje koszty wykorzystania zasobów, takich jak układy GPU. Dodatkowo, kolekcja aplikacji Rancher Prime dla Kubernetesa obejmuje teraz KubeFlow, oferując bezpieczny stos AI, zapewniając kontrolę danych i wykorzystując rozwiązania tworzone przez społeczność. Wreszcie, wersja 3.1 wydłuża wsparcie cyklu życia do 24 miesięcy i wprowadza 3-letnią opcję Extreme dla RKE2 i k3s.
  • NeuVector Prime 5.4 – Opierając się na rozszerzeniu interfejsu użytkownika Rancher Prime wydanym na początku tego roku, NeuVector Prime 5.4 będzie teraz umieszczać wyniki skanowania bezpośrednio w zasobach Rancher Prime, takich jak pody i węzły, wraz z przyciskiem skanowania. Wersja 5.4 wprowadza również nową strukturę raportowania zgodności, usprawniającą dostępność nowych/zaktualizowanych raportów zgodności (np. DISA-STIG). Dodatkowo, wersja 5.4 wprowadza rozproszone zabezpieczenia przed atakami typu denial-of-service, uruchamiając alerty i blokowanie po przekroczeniu progów maksymalnej szybkości połączeń lub wykorzystania przepustowości.
  • Harvester 1.3.1: Najnowsza wersja natywnej dla chmury platformy wirtualizacyjnej SUSE zapewnia klientom możliwość przejścia ze starszych rozwiązań opartych na VMware i innych maszynach wirtualnych na nowoczesne rozwiązania cloud native. Zaprojektowana z myślą o znacznej poprawie wydajności sztucznej inteligencji i innych obciążeń oraz rozszerzeniu możliwości Harvestera na szerszy zakres platform sprzętowych, wersja ta zapewnia płynną integrację i optymalne wykorzystanie zasobów w różnych środowiskach obliczeniowych. Harvester 1.3.1 wprowadza istotne ulepszenia w zakresie AI i kompatybilności sprzętowej, w tym obsługę najnowocześniejszych architektur vGPU i ARM.

Rozwiązania Edge

Wraz ze wzrostem znaczenia natychmiastowego dostępu do danych, sieci i usług komunikacyjnych, priorytetem dla dostawców usług komunikacyjnych (CSP) i przedsiębiorstw jest szybkie gromadzenie i przetwarzanie danych z inteligentnych urządzeń, czujników i kontrolerów. Zapewnia to tym organizacjom wgląd w procesy biznesowe i daje im narzędzia do dostarczania nowych i innowacyjnych usług użytkownikom.  SUSE Edge umożliwia transformację opartą na rozwiązaniach cloud native, dostarczając wyspecjalizowaną platformę obliczeniową do zarządzania pełnym cyklem życia urządzeń brzegowych na dużą skalę. Ponadto SUSE Adaptive Telco Infrastructure Platform (ATIP) opiera się na SUSE Edge, aby zapewnić zoptymalizowaną pod kątem telekomunikacji platformę przetwarzania brzegowego dla dostawców usług płatniczych w celu przyspieszenia wdrożeń skonteneryzowanych funkcji sieciowych (CNF) w środowiskach sieci telekomunikacyjnych. Firma SUSE poinformowała dziś o kolejnych ulepszeniach wprowadzanych w ofertach SUSE Edge i SUSE ATIP:

  • SUSE Edge 3.0: SUSE Edge 3.0 jest zoptymalizowany do pracy przy ograniczonych zasobach, w odległych lokalizacjach z przerywaną łącznością z Internetem, dzięki czemu idealnie nadaje się do urządzeń wbudowanych. SUSE Edge jest oparty na SUSE Linux Enterprise Micro, wykorzystuje certyfikowane przez CNCF dystrybucje Kubernetes oraz obsługuje zarządzanie i uruchamianie kontenerów, maszyn wirtualnych i mikrousług. Rozwiązanie Edge 3.0 firmy SUSE wykorzystuje możliwości zarządzania Kubernetes Rancher Prime, natywne zabezpieczenia kontenerów w chmurze NeuVector Prime oraz w pełni zweryfikowany, zoptymalizowany pod kątem urządzeń brzegowych i zintegrowany stos rozwiązań działających natywnie w chmurze, zapewniający pełne zarządzanie cyklem życia urządzeń brzegowych na dużą skalę.
  • SUSE Adaptive Telco Infrastructure Platform 3.0: Najnowsza wersja wprowadza komercyjną implementację projektu Sylva fundacji Linux Foundation Europe, co pozwala dostawcom CSP na obniżenie zużycia energii i przestrzeganie zasad open source. To wydanie wprowadza również Edge Image Builder, który umożliwia tworzenie niestandardowych artefaktów wdrożeniowych w celu tworzenia klastrów brzegowych w najbardziej odległych lokalizacjach. ATIP 3.0 zapewnia również dostarczanie klastrów bare metal zgodnie z polityką zerowego zaufania przy użyciu Cluster API (CAPI) i Metal3 (metal kubed).

Organizacje  na całym świecie zdają sobie sprawę z nieograniczonego potencjału sztucznej inteligencji, dlatego firma SUSE zaprezentowała również swoją strategię i plany działania w zakresie sztucznej inteligencji, koncentrując się na zaangażowaniu w otwartą, bezpieczną i zgodną z przepisami sztuczną inteligencję dla przedsiębiorstw. Obejmuje to program wczesnego dostępu SUSE AI Early Access Program, który skupia klientów i partnerów mających kierować przyszłością bezpiecznej sztucznej inteligencji o otwartym kodzie źródłowym.

Więcej informacji o najnowszych innowacjach SUSE w obszarze Linuksa, rozwiązań cloud native oraz edge można znaleźć na stronie http://www.suse.com.

SUSE rozbudowuje ofertę rozwiązań do zarządzania kontenerami, aby pomóc inżynierom ds. platform w zarządzaniu na dużą skalę i obsłudze obciążeń AI/ML

Tuesday, 19 March, 2024

SUSE rozbudowuje ofertę rozwiązań do zarządzania kontenerami, aby pomóc inżynierom ds. platform w zarządzaniu na dużą skalę i obsłudze obciążeń AI/ML. Nowe funkcje dodane do Rancher Prime 3.0 obejmują umożliwienie dostarczania samoobsługowych usług PaaS, powszechną dostępność zbioru aplikacji Rancher Prime oraz ulepszoną obsługę obciążeń AI/ML. Zoptymalizowany pakiet SUSE Edge 3.0 zapewnia bezpieczeństwo i skalowalność – za pomocą otwartego oprogramowania.

SUSE, firma tworząca systemy SUSE Linux Enterprise, Rancher Prime i NeuVector Prime, ogłosiła dziś wprowadzenie ulepszonych wersji systemów chmurowych i brzegowych, aby umożliwić klientom bezpieczne wdrażanie opartych na oprogramowaniu rozwiązań biznesowych i zarządzanie nimi w dowolnym miejscu. Nowe funkcje w Rancher Prime 3.0 (komercyjnym rozwiązaniu Rancher firmy SUSE, będącym najczęściej stosowaną w branży platformą open source do zarządzania kontenerami w przedsiębiorstwach) oraz w oprogramowaniu SUSE Edge 3.0 zapewniają klientom swobodę wyboru i bezpieczeństwo, ponieważ są rozwiązaniami opartymi w 100% na otwartym kodzie źródłowym.

„W firmie SUSE użytkownicy komercyjni i społeczność open source są równie ważni” – powiedział Peter Smails, dyrektor generalny działu SUSE Enterprise Container Management. „W związku z tym nasza misja jest dwojaka; musimy dostarczać możliwości, których potrzebują nasi klienci biznesowi, aby wdrażać i zarządzać ich ważnymi zadaniami produkcyjnymi, a jednocześnie nadal inwestować w innowacje, aby wspierać i rozwijać naszą ogromną społeczność użytkowników open source. Dzisiejsze ogłoszenie dotyczy obu tych aspektów.

Bezpieczeństwo i zarządzanie cyklem życia, możliwość realizacji samoobsługowej platformy PaaS za pomocą Rancher Prime  

Nowe funkcje w Rancher Prime 3.0 pomagają działom IT dostarczać samoobsługową platformę jako usługę (PaaS) dla swoich zespołów programistów, a także zapewniają ulepszone wsparcie dla obciążeń AI.

Nowe ulepszenia Rancher Prime 3.0 obejmują:

  • Ulepszony bezpieczny łańcuch dostaw oprogramowania z certyfikacją SLSA i listą komponentów oprogramowania (SBOM) zapewnia zaufane dostarczanie oprogramowania, co jest niezbędne dla użytkowników biznesowych.
  • Zaktualizowane zarządzanie cyklem życia oprogramowania zapewnia spójne, powtarzalne wydania ściśle dostosowane do cyklu życia Kubernetesa.
  • Ogólna dostępność interfejsu API klastrów i nowych klas klastrów umożliwia zespołom inżynierów ds. platform dostarczanie samoobsługowych usług PaaS, pozwalając im na automatyczne skalowanie i przyspieszenie przejścia od kodu do produkcji.
  • Powszechna dostępność Rancher Prime Application Collection zapewnia dostęp do aplikacji open source za pośrednictwem jednej, zaufanej platformy dystrybucyjnej klasy enterprise.
  • Certyfikowane dystrybucje Kubernetes RKE2 i K3s zostały ulepszone, aby automatycznie wykrywać/konfigurować użycie kontenerowych środowisk uruchomieniowych NVIDIA, upraszczając wdrażanie obciążeń AI/ML.

Ponadto SUSE wprowadziła na rynek zestaw Rancher Enterprise, oferujący w jednym pakiecie i w jednej cenie całą gamę rozwiązań Rancher Prime – do administrowania wieloma klastrami Kubernetes, zarządzania systemami operacyjnymi i maszynami wirtualnymi, zapewniający trwałą pamięć masową oraz certyfikowane systemy operacyjne SUSE Linux Enterprise Micro.

Dalsze inwestycje w innowacje i wspieranie społeczności open source

SUSE nieustannie inwestuje w innowacje open source w ramach całego swojego portfolio rozwiązań natywnych dla chmury, aby wspierać szeroką społeczność użytkowników.  Kluczowe ulepszenia obejmują:

  • Harvester 1.3.0: Karty GPU obsługują tworzenie wirtualnych procesorów graficznych (vGPU), umożliwiając użytkownikom przypisanie vGPU do jednej lub więcej maszyn wirtualnych utworzonych przez Harvester, a ponadto jest już dostępna obsługa Arm w ramach Technical Preview.
  • Longhorn 1.6.0: Najnowsza aktualizacja Data Engine w wersji 2.0 technical preview umożliwia płynne tworzenie kopii zapasowych wolumenów o wysokiej wydajności i przywracanie operacji pomiędzy silnikami danych w wersji pierwszej i drugiej.
  • RKE2 i K3s: Obsługa procesorów graficznych NVIDIA i pełna obsługa Arm są już ogólnie dostępne.
  • NeuVector Prime 5.3.0: Nowe funkcje obejmują widoczność połączeń sieciowych i automatyzację GitOps oraz rozszerzoną obsługę architektur arm64.

Pełną listę nowości można znaleźć tutaj.

SUSE Edge 3.0 rozszerza możliwości otwartego oprogramowania na urządzenia brzegowe

Potrzeby klientów w obszarze dostarczania najwyższej jakości usług brzegowych rosną w szybkim tempie. Według IDC 25 proc. wydatków na infrastrukturę przedsiębiorstw będzie przeznaczonych na urządzenia brzegowe[1].  SUSE Edge 3.0 wychodzi naprzeciw tym rosnącym wymaganiom, dostarczając wysoce zweryfikowany, zintegrowany, zoptymalizowany stos rozwiązań Edge.

„Edge to kolejna płaszczyzna innowacji, jednakże wiele organizacji zmaga się z wyzwaniami. Od znajomości sposobów wdrażania w odpowiedniej skali, po ograniczenia dotyczące zasobów i dług technologiczny – od tego wszystkiego zależy tempo transformacji na brzegu sieci” – powiedział Keith Basil, dyrektor generalny działu biznesowego SUSE Edge. „Edge polega przede wszystkim na przenoszeniu wartości biznesowej i mocy obliczeniowej tam, gdzie znajdują się klienci i dane, tam gdzie przynosi to największe korzyści. SUSE Edge 3.0 jest tym, czego potrzebują firmy, aby wdrażać rozwiązania brzegowe bezpiecznie, niezawodnie i na dużą skalę, by pomóc im rozwijać się i utrzymywać przewagę konkurencyjną”.

Oprogramowanie SUSE Edge 3.0, stworzone specjalnie z myślą o brzegu sieci i oparte w całości na rozwiązaniach open source od SUSE, zapewnia:

  • W pełni zintegrowaną, natywną dla chmury platformę brzegową: zwiększa wydajność infrastruktury brzegowej.
  • Bezpieczeństwo klasy korporacyjnej: Kompleksowe zabezpieczenia na takim samym poziomie jak w centrum danych, dla każdego urządzenia brzegowego, niezależnie od jego lokalizacji.
  • Skalowalność: Łatwe wdrażanie i zarządzanie infrastrukturą brzegową, od setek do dziesiątek tysięcy węzłów.

Rancher Prime 3.0 i SUSE Edge 3.0 będą dostępne w kwietniu 2024 roku.

[1] IDC, Worldwide Edge Enterprise Infrastructure Forecast, 2022-2027 (IDC #US5131392, listopad 2023)

O firmie SUSE

SUSE jest światowym liderem w dziedzinie innowacyjnych, niezawodnych i bezpiecznych rozwiązań open source dla przedsiębiorstw, w tym SUSE Linux Enterprise (SLE), Rancher i NeuVector. Ponad 60% firm z listy Fortune 500 korzysta z rozwiązań SUSE do obsługi obciążeń o znaczeniu krytycznym, umożliwiając im wprowadzanie innowacji wszędzie – od centrum danych po chmurę, urządzenia brzegowe i nie tylko. SUSE przywraca “otwartość” do otwartego oprogramowania, współpracując z partnerami i społecznościami, aby zapewnić klientom sprawność w radzeniu sobie z wyzwaniami związanymi z innowacjami dzisiaj i swobodę ewolucji ich strategii i rozwiązań jutro. Więcej informacji można znaleźć na stronie  www.suse.com.