手把手教你搭建SUSE Enterprise Storage (内有教学视频)
本文是手把手教学系列之一:手把手教你搭建企业级Ceph,由SUSE技术专家陈希典提供。
SUSE Enterprise Storage 是软件定义的储存解决方案,高度可伸缩和可恢复,由 Ceph 技术提供支持。它使组织能够采用行业标准、现成的服务器和磁盘驱动器来构建经济高效和高度可伸缩的储存。
通过将物理储存硬件(数据平台)与数据储存管理逻辑或“智能”(控制平台)分隔,此解决方案无需专有的硬件组件,让您可以利用现成的低成本硬件。
SUSE Enterprise Storage 提供软件定义的智能储存管理解决方案。独立硬件供应商 (IHV) 合作伙伴提供现成的储存硬件。SUSE 与其 IHV 合作伙伴合作,提供经济高效的业界领先可伸缩储存解决方案。
下面手把手演示如何搭建SUSE Enterprise Storage。
Ceph网络架构
- 网络环境配置
主机名 Public网络 管理网络 集群网络 说明 admin 192.168.2.39 172.200.50.39 — 管理节点 node001 192.168.2.40 172.200.50.40 192.168.3.40 MON,OSD node002 192.168.2.41 172.200.50.41 192.168.3.41 MON,OSD node003 192.168.2.42 172.200.50.42 192.168.3.42 MON,OSD ntp 192.168.2.39 — — 时间同步 - 关于DeepSea更多资料:
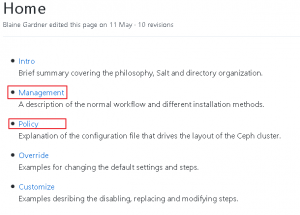
https://github.com/SUSE/DeepSea/wiki

1. 初始化配置
1.1. 临时IP地址设置
ip link set eth0 up
ip addr add 172.200.50.39/24 dev eth0
1.2. 关闭防火墙(所有节点和admin)
# sudo /sbin/SuSEfirewall2 off
1.3. 关闭IPV6 (所有节点和admin)
# vim /etc/sysctl.conf
net.ipv6.conf.all.disable_ipv6 = 1
net.ipv6.conf.default.disable_ipv6 = 1
net.ipv6.conf.lo.disable_ipv6 = 1
# sysctl -p
OSD 数量较多(如 20 个以上)的主机会派生出大量线程,尤其是在恢复和重均衡期间。很多 Linux 内核默认的最大线程数较小(如 32k 个),如果您遇到了这类问题,可以把 kernel.pid_max 值调高些。理论最大值是 4194303 。
# vim /etc/sysctl.conf
kernel.pid_max = 4194303
1.4. 仓库配置
# zypper lr
Repository priorities are without effect. All enabled repositories share the same priority.
# | Alias | Name
+—————————————————-+—————————————————-
1 | SLE-Module-Basesystem-SLES15-SP1-Pool | SLE-Module-Basesystem-SLES15-SP1-Pool
2 | SLE-Module-Basesystem-SLES15-SP1-Upadates | SLE-Module-Basesystem-SLES15-SP1-Upadates
3 | SLE-Module-Legacy-SLES15-SP1-Pool | SLE-Module-Legacy-SLES15-SP1-Pool
4 | SLE-Module-Server-Applications-SLES15-SP1-Pool | SLE-Module-Server-Applications-SLES15-SP1-Pool
5 | SLE-Module-Server-Applications-SLES15-SP1-Upadates | SLE-Module-Server-Applications-SLES15-SP1-Upadates
6 | SLE-Product-SLES15-SP1-Pool | SLE-Product-SLES15-SP1-Pool
7 | SLE-Product-SLES15-SP1-Updates | SLE-Product-SLES15-SP1-Updates
8 | SUSE-Enterprise-Storage-6-Pool | SUSE-Enterprise-Storage-6-Pool
9 | SUSE-Enterprise-Storage-6-Updates | SUSE-Enterprise-Storage-6-Updates
10 | SUSE-Enterprise-Storage-6-Updates | SUSE-Enterprise-Storage-6-Updates
1.5. 设置别名
# vim /root/.bash_profile
alias cd..=’cd ..’
alias dir=’ls -l’
alias egrep=’egrep –color=auto’
alias fgrep=’fgrep –color=auto’
alias grep=’grep –color=auto’
alias l=’ls -alF’
alias la=’ls -la’
alias ll=’ls -l’
alias ls-l=’ls -l’
1.6. 安装基础软件
# zypper in -y -t pattern yast2_basis base
# zypper in -y net-tools vim man sudo tuned irqbalance
# zypper in -y ethtool rsyslog iputils less supportutils-plugin-ses
# zypper in -y net-tools-deprecated tree wget
1.7. 配置时钟同步(admin节点)
Admin节点,配置NTP服务,如果没有ntp服务器,默认以admin节点为ntp server
- Admin节点配置,其他节点可以通过deepsea自动添加
# vim /etc/chrony.conf
# Sync to local clock # 添加本地时钟源
server 127.0.0.1
allow 127.0.0.0/8
allow 192.168.2.0/24
allow 172.200.50.0/24
local stratum 10
- 启动服务
# systemctl restart chronyd.service
# systemctl enable chronyd.service
# systemctl status chronyd.service
- 检查时钟同步
# chronyc sources
210 Number of sources = 1
MS Name/IP address Stratum Poll Reach LastRx Last sample
===============================================================================
^* 127.127.1.0 12 6 37 23 +1461ns[+3422ns] +/- 166us
1.8. 调整网络优化参数
# tuned-adm profile throughput-performance
# tuned-adm active
# systemctl start tuned.service
# systemctl enable tuned.service
1.9. 编辑hosts文件
# vim /etc/hosts
192.168.2.39 admin.example.com admin
192.168.2.40 node001.example.com node001
192.168.2.41 node002.example.com node002
192.168.2.42 node003.example.com node003
1.10. 执行更新操作系统,并重启
# zypper ref
# zypper -n update
# reboot
2. 安装部署Storage 6
2.1. 安装deepsea和salt
- admin节点安装deepsea(安装时包括satl minion和master)
# zypper -n in deepsea
# systemctl restart salt-master.service
# systemctl enable salt-master.service
# systemctl status salt-master.service
- 所有的ceph集群节点node001 node002 node003安装salt-minion
# zypper -n in salt-minion
- 所有的minions上,修改配置文件(包括admin节点也安装了)
# vim /etc/salt/minion
#master: salt
master: 172.200.50.39
或采用sed直接插入替换
# sed -i ’17i\master: 172.20.2.39′ /etc/salt/minion
- 启动服务
# systemctl restart salt-minion.service
# systemctl enable salt-minion.service
# systemctl status salt-minion.service
- 认证
- 帮助信息
# salt-key –help
-A, –accept-all Accept all pending keys. # 同意所有的key,在刚开始有很多设备时。
-d DELETE, –delete=DELETE # 删除指定的key
Delete the specified key.Globs are supported.
-D, –delete-all Delete all keys. # 删除所有的key
- Master 查看认证(admin节点)
# salt-key
Accepted Keys: 同意接受的key
Denied Keys:
Unaccepted Keys: 不同意接受的key:
admin.example.com
node001.example.com
node002.example.com
node003.example.com
Rejected Keys:
- 接受所有的key
# salt-key –accept-all
# salt-key
Accepted Keys:
admin.example.com
node001.example.com
node002.example.com
node003.example.com
Denied Keys:
Unaccepted Keys:
Rejected Keys:
- 远程执行,测试是否连接正常
# salt ‘*’ test.ping # 测试是否正常连通
node001.example.com:
True
node003.example.com:
True
node002.example.com:
True
admin.example.com:
True
2.2. DeepSea阶段说明
- stage 0 — 准备:在此阶段,将应用全部所需的更新,并且可能会重引导您的系统。
- stage 1 — 发现:在此阶段,将检测集群中的所有硬件,并收集 Ceph 配置所需信息
- stage 2 — 配置:您需要以特定的格式准备配置数据。
- stage 3 — 部署:创建包含必要 Ceph 服务的基本 Ceph 集群。
- stage 4 — 服务:可在此阶段安装 Ceph 的其他功能,例如 iSCSI、对象网关和 CephFS。其中每个功能都是可选的。
- stage 5 — 删除阶段:此阶段不是必需的,在初始设置期间,通常不需要此阶段。在此阶段,将会删除 Minion 的角色以及集群配置。
2.3. 装配Storag6
注意:安装时有如下报错信息可忽略,未来更新包会修复该问题
No minions matched the target. No command was sent, no jid was assigned.
No minions matched the target. No command was sent, no jid was assigned.
[ERROR ] Exception during resolving address: [Errno 2] Host name lookup failure
[ERROR ] Exception during resolving address: [Errno 2] Host name lookup failure
[WARNING ] /usr/lib/python3.6/site-packages/salt/grains/core.py:2827: DeprecationWarning:
This server_id is computed nor by Adler32 neither by CRC32. Please use “server_id_use_crc”
option and define algorithm youprefer (default “Adler32”). The server_id will be computed
withAdler32 by default.
Github链接:
https://github.com/SUSE/DeepSea/issues/1593
- 运行准备阶段
该阶段会同步模块和 Grains 数据,以便新的 Minion 可以提供 DeepSea需要的所有信息,注意报错
# salt-run state.orch ceph.stage.0
No minions matched the target. No command was sent, no jid was assigned.
No minions matched the target. No command was sent, no jid was assigned.
ceph_version : valid
deepsea_minions : [‘No minions matched for G@deepsea:* – check /srv/pillar/ceph/deep
sea_minions.sls’]
master_minion : [‘Missing pillar data’]
- 修改如下配置文件,然后执行stage0
vim /srv/pillar/ceph/deepsea_minions.sls
# Choose minions with a deepsea grain
#deepsea_minions: ‘G@deepsea:*’ # 注释掉
# Choose all minions
deepsea_minions: ‘*’ # 取消注释
# Choose custom Salt targeting
# deepsea_minions: ‘ses*’
- 快速修改方法
# cp -p /srv/pillar/ceph/deepsea_minions.sls /tmp/
# sed -i “4c # deepsea_minions: ‘G@deepsea:*'” /srv/pillar/ceph/deepsea_minions.sls
# sed -i “6c deepsea_minions: ‘*'” /srv/pillar/ceph/deepsea_minions.sls
- 发现 discovery
该阶段将在 /srv/pillar/ceph/proposals 目录中写入新的文件项,您可在其中编辑相关的 .yml 文件:
# salt-run state.orch ceph.stage.1
# ll /srv/pillar/ceph/proposals/ -d
drwxr-xr-x 20 salt salt 4096 Oct 7 14:36 /srv/pillar/ceph/proposals/
- 设置osd盘,使用bluestore引擎,nvme0n1磁盘存放“db和wal日志”
- 备份配置文件
# cp /srv/salt/ceph/configuration/files/drive_groups.yml \
/srv/salt/ceph/configuration/files/drive_groups.yml.bak
- 查看OSD节点磁盘情况(node001,node002,node002)
# ceph-volume inventory
Device Path Size rotates available Model name
/dev/nvme0n1 20.00 GB False True VMware Virtual NVMe Disk
/dev/sdb 10.00 GB True True VMware Virtual S
/dev/sdc 10.00 GB True True VMware Virtual S
/dev/sda 20.00 GB True False VMware Virtual S
/dev/sr0 1024.00 MB True False VMware SATA CD01
- 编辑配置文件
# vim /srv/salt/ceph/configuration/files/drive_groups.yml
drive_group_hdd_nvme: # 目标为 storage角色节点
target: ‘I@roles:storage’
data_devices:
size: ‘9GB:12GB’ # 数据设备按照磁盘大小来区分,9G到12G之间
db_devices:
rotational: 0 # 非机械设备 SSD or NVME
block_db_size: ‘2G’ # 指定 db大小为2GB (大小按实际情况)
- 显示OSD配置报告
# salt-run disks.report
node003.example.com:
–
Total OSDs: 2
Solid State VG:
Targets: block.db Total size: 19.00 GB
Total LVs: 2 Size per LV: 1.86 GB
Devices: /dev/nvme0n1
Type Path LV Size % of device
—————————————————————-
[data] /dev/sdb 9.00 GB 100.0%
[block.db] vg: vg/lv 1.86 GB 10%
—————————————————————-
[data] /dev/sdc 9.00 GB 100.0%
[block.db] vg: vg/lv 1.86 GB 10%
注意:如果磁盘无法识别请使用如下命令格式化,不能有GPT分区
# ceph-volume lvm zap /dev/xx
- 新建policy.cfg文件
The file is divided into four sections:分为4个区域
- Cluster Assignment.
- Role Assignment.
- Common Configuration.
- Profile Assignment
- 添加角色,服务 ,硬件和集群配置等(具体参考Storage部署指南)
# vim /srv/pillar/ceph/proposals/policy.cfg
## Cluster Assignment
cluster-ceph/cluster/*.sls
## Roles
# ADMIN
role-master/cluster/admin*.sls
role-admin/cluster/admin*.sls
# Monitoring
role-prometheus/cluster/admin*.sls
role-grafana/cluster/admin*.sls
# MON
role-mon/cluster/node00[1-3]*.sls
# MGR (mgrs are usually colocated with mons)
role-mgr/cluster/node00[1-3]*.sls
# COMMON
config/stack/default/global.yml
config/stack/default/ceph/cluster.yml
# Storage
role-storage/cluster/node00*.sls
- 系统自带policy.cfg的example,可供参考
# ll /usr/share/doc/packages/deepsea/examples/
total 12
-rw-r–r– 1 root root 409 Nov 20 2016 policy.cfg-generic
-rw-r–r– 1 root root 593 Nov 20 2016 policy.cfg-regex
-rw-r–r– 1 root root 478 Nov 20 2016 policy.cfg-rolebased
- 由于配置管理 public cluster 3个网络,因此要修改网络配置文件
修改public_network文件为192.168.2.0/24
# vim config/stack/default/ceph/cluster.yml
– master
cluster_network: 192.168.3.0/24
fsid: bfcca41b-3846-3735-881f-b16f01bd157d
public_network: 192.168.2.0/24
- 运行配置阶段。
- 该阶段会读取 /srv/pillar/ceph 下的所有内容,并相应地更新Pillar:
# salt-run state.orch ceph.stage.2
# salt ‘*’ saltutil.pillar_refresh
# salt ‘*’ pillar.items # 查看之前定义的角色,这步非常重要
或
# salt ‘node002*’ pillar.items # 查看某节点定义角色
- 装配集群阶段
- 由于目前只有3个OSD节点,默认配置必须要4个OSD节点,为规避该问题,修改如下配置文件
# sed -i ‘s/if (not self.in_dev_env and len(storage) < 4/if \
(not self.in_dev_env and len(storage) < 2/g’ \
/srv/modules/runners/validate.py
- 运行stage3 , stage4
# salt-run state.orch ceph.stage.3
# salt-run state.orch ceph.stage.4
- 查看集群状态和OSD分配信息
# ceph -s # 查看集群状态
# ceph osd tree # 查看osd分配信息
- 查看集群版本
# ceph -v
ceph version 14.2.1-468-g994fd9e0cc (994fd9e0ccc50c2f3a55a3b7a3d4e0ba74786d50)
nautilus (stable)
3. Haproxy和仪表盘
3.1. 安装配置
- 添加仓库,安装 haproxy
# zypper ar \
http://172.200.50.19/repo/SUSE/Products/SLE-Product-HA/15-SP1/x86_64/product/ \
SLE-Products-HA-SLES15-SP1-Pool
# zypper -n in haproxy
- 编辑haproxy配置文件,添加到最后
# vim /etc/haproxy/haproxy.cfg
……
frontend http_web
option tcplog
bind 0.0.0.0:8443 # 定义bind绑定,监听那个套接字
mode tcp
default_backend dashboard
backend dashboard
mode tcp
option log-health-checks
option httpchk GET /
http-check expect status 200
server mgr1 172.200.50.40:8443 check ssl verify none
server mgr2 172.200.50.41:8443 check ssl verify none
server mgr3 172.200.50.42:8443 check ssl verify none
- 启动haproxy服务
# systemctl start haproxy.service
# systemctl enable haproxy.service
# systemctl status haproxy.service
- 检查端口
# netstat -ntulp
Proto Recv-Q Send-Q Local Address Foreign Address State PID/Program name
tcp 0 0 0.0.0.0:8443 0.0.0.0:* LISTEN 20264/haproxy
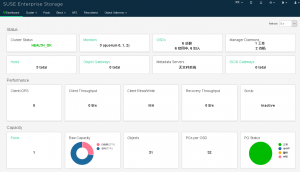
- 状态监控页面
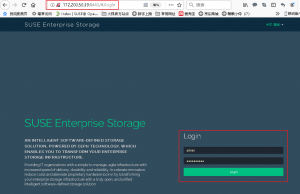
http://172.200.50.39/#/

- 查看dashboard管理员密码:
# salt-call grains.get dashboard_creds
local:
———-
admin:
9KyIXZSrdW
- windows主机添加域名解析
C:\Windows\System32\drivers\etc\host
127.0.0.1 localhost
172.200.50.39 admin.example.com
3.2. 访问页面
http://172.200.50.39:8443/#/dashboard


手把手教你搭建SUSE Enterprise Storage视频:
https://v.qq.com/x/page/h3067zao6rl.html
参考资料:
https://documentation.suse.com/ses/6/
No comments yet